| Windows Phone 7 - using the Panorama control |
| Written by Mike James | ||||||
| Monday, 20 September 2010 | ||||||
Page 1 of 5 The Panorama control makes it easy to create Windows Phone 7 apps that behave like Phone apps should. The only problem is that it all looks complicated. Find out just how easy it all is in our Panorama-ic tutorial. 
More Windows Phone Articles: Windows Phone 7 - the Bing Maps Control Windows Phone 7 - Snakes on a Phone Part 1 Getting started with Windows Phone 7
You really know that you are working with a Phone app when you base it on the new Panorama control. This allows you to build a menu object that the user can swipe scroll through both horizontally and vertically to present far more choices than could normally be accommodated on a small screen. It is so good you can't imagine why it isn't included as a control in standard Silverlight? This article explains the basic functioning of the control and the general principles that are used in the code that Visual Studio generates for a Panorama project - which goes well beyond creating an empty application with a control ready for you to use. Getting startedGetting started with the Panorama control is simple enough. Make sure you have the latest Windows Phone 7 (WP7)tools installed and, as long as you have you will be offered a new type of WP7 project - a Windows Phone Panorama Application.
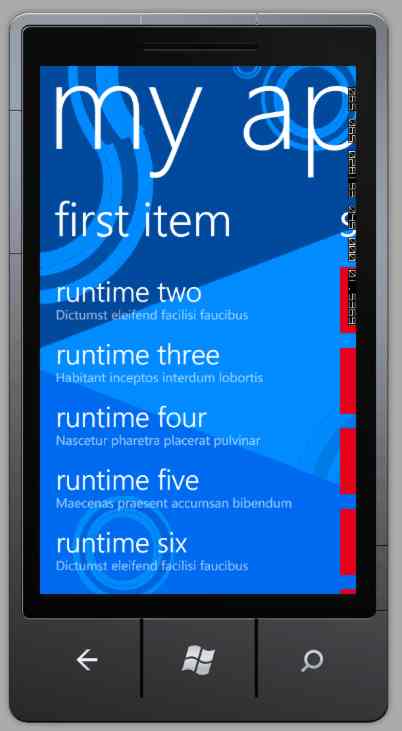
The Panoram control so dominates an application that it isn't made available in the toolbox to be placed in a user design its been implemented as a template - think of it as an alternative to a Grid or StackPanel as the basic layout container. In fact the generated project still uses a Grid as the LayoutRoot but most of your customisation will work directly with the Panorama control. When the new project is ready you will immediately notice that it has generated a lot of XAML and the design surface if full of what looks like a fairly complex layout. You will also discover that there is quite a lot of C# code in two files - an ItemViewModel and a MainViewModel. These are designed to provide the sample data to the Panorama control so that you can see it in action. In principle you should build your own app by customising these two code modules. In practice how ever tying to understand how the Panorama control works isn't easy with so much extra complexity - so after examining its basic behaviour using the generated code we will ignore it and work with something simpler. To understand what the Panorama control can do for you your best option is to simply run the generated project. When the phone simulator loads you will see the app occupying the full screen. You will see a heading saying "first item" and below it a list of menu options "runtime one", "runtime two" and so on.
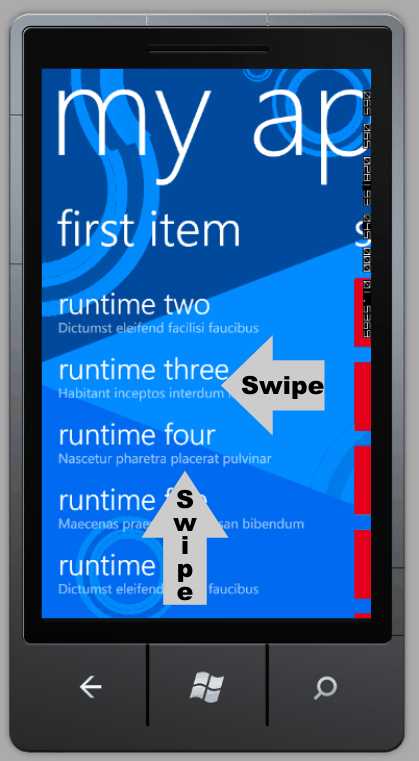
If you look carefully there you should notice that there appear to be more items at the bottom of the screen and to the right. If you swipe the display, click the left mouse button and drag while holding down then release, in the up direction you see additional list items. If you swipe to the left you will see another list slide in. The speed of movement of the items depend on how hard you swipe and the movement is implemented with inertia - i.e. it carries on moving after the swipe - to provide a good user interaction experience.
Now that you have seen the Panorama control in action you can see that what it is all about is giving you a bigger canvas to draw your applications on. Instead of having to work in the confines of the screen you can use as big an area as you like and let the user scroll naturally around your user interface. In design mode the Panorama control doesn't swipe in the same way but you can access other lists and other list items by simply clicking on the right hand side or the bottom of the design area.
|
||||||
| Last Updated ( Monday, 11 October 2010 ) |