| Android Adventures - Dialog Classes In DialogFragments |
| Written by Mike James | ||||
| Thursday, 31 July 2014 | ||||
Page 3 of 3
Custom AlertDialogWhat if you want to add some custom UI to the AlertDialog? One answer might be that you would probably be better off not using the AlertDialog in this case as the DialogFragment is up to the job and simpler. However there are advantages to adding custom UI to the AlertDialog and it isn't difficult. Let's display the DialogFragment's layout in the AlertDialog. To do this we need to make the addition to the Builder before the create method is called. To use the layout file we need to first inflate it into a hierarchy of View objects and to do this we need a LayoutInflater:
Finally we use the Builder's setView method to set the view. This can go anywhere but it has to go before the .create method:
Now if you run the app you will see the generated layout saying "Hello blank Fragment" in the display area of the dialog. You can of course customize the layout file using the designer to be anything you want. If you want to add customization in code to the layout, e.g. add a button click event handler, then you can do it in the usual way and you can do this before or after the dialog has been created. For example, if you add a Button to the layout you can add an event handler using:
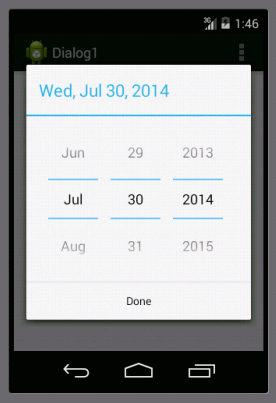
The only difficult part is remembering to use the View hiearchy to find the Button. Advantages And DisadvantagesIf you use an AlertDialog box to generate the UI of the DialogFragment then you cannot use it as part of the Activity's UI i.e. without a separate dialog window. A DialogFragment based on an AlertDialog can only be displayed as a dialog. However, if you use the DialogFragment approach then it can be managed by the FragmentManager and it can be added to the backstack in the usual way. In addition you can create dialogs that you can use with any Activity, i.e. they are truly reusable. Date And Time Picker DialogsThe date and time pickers are available as widgets or as full Dialog classes. We have already looked at how to use them as widgets in chapter six and seven along with the number picker which doesn't have an alternative Dialog class but which can be packaged into one if you really need to. As with any dialogs you can use the date and time picker dialogs standalone but it is much better to package them into DialogFragments. How you do this is exactly the same as for any other dialog but it is worth a quick look. For example to create a date picker dialog as a DialogFragment you simply have to return a DatePickerDialog in the onCreateDialog:
The last three parameters of the constructor set the initial date. There is a method that lets you get the DatePicker widget in the dialog so you can work with it directly. The callback provides the date the user selected and this should be routed to the Activity if necessary via the usual Fragment Interface pattern.
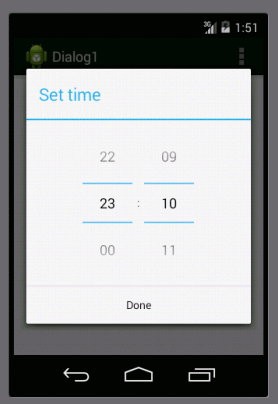
The TimePickerDialog works in the same way
The final three parameters in the constructor give the hours and minutes and whether to use the 24 hour clock or not.
What about the number picker as a dialog? You could use it to customize an AlertDialog via a layout but it makes much more sense to simply display it using a DialogFragment. Using this approach it gets all the advantages of a Fragment and it can be shown as a dialog or embedded in the UI as required. The biggest problem is that number pickers are usually used in combination - to enter a multi-digit number say. So to create a good number picker dialog box you would need to allow for different numbers of number pickers. Very do-able but difficult to do well. Summary
You can download the code for the programs from the CodeBin (note you have to register first).
Android Adventures - Mastering Fragments & Dialogs
ContentsThis book is currently being revised. Chapter 5 and later refer to an earlier version of Android Studio - revisit for updates.
If you are interested in creating custom template also see: Custom Projects In Android Studio
To be informed about new articles on I Programmer, install the I Programmer Toolbar, subscribe to the RSS feed, follow us on, Twitter,Facebook, Google+ or Linkedin, or sign up for our weekly newsletter.
Comments
or email your comment to: comments@i-programmer.info |
||||
| Last Updated ( Saturday, 25 July 2015 ) |


