| Setting Up Site-To-Site OpenVPN |
| Written by Sam James | |||||||||||
| Monday, 30 August 2021 | |||||||||||
Page 4 of 4
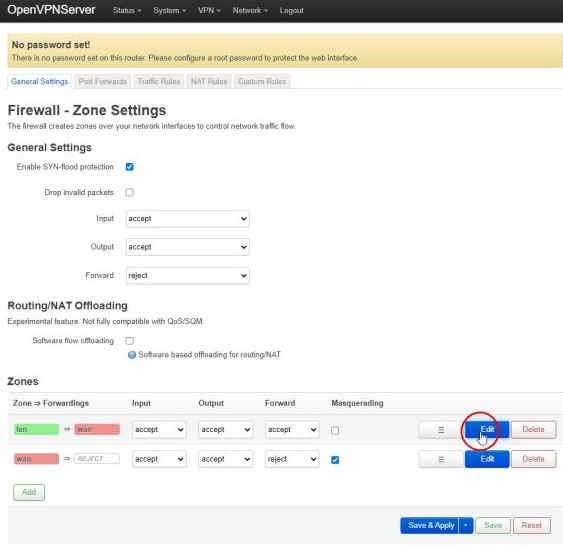
To add the TUN0 device to the LAN firewall zone on the server, select Network→Firewall from the top menu then the Edit button next to the lan→wan in the Zones list:
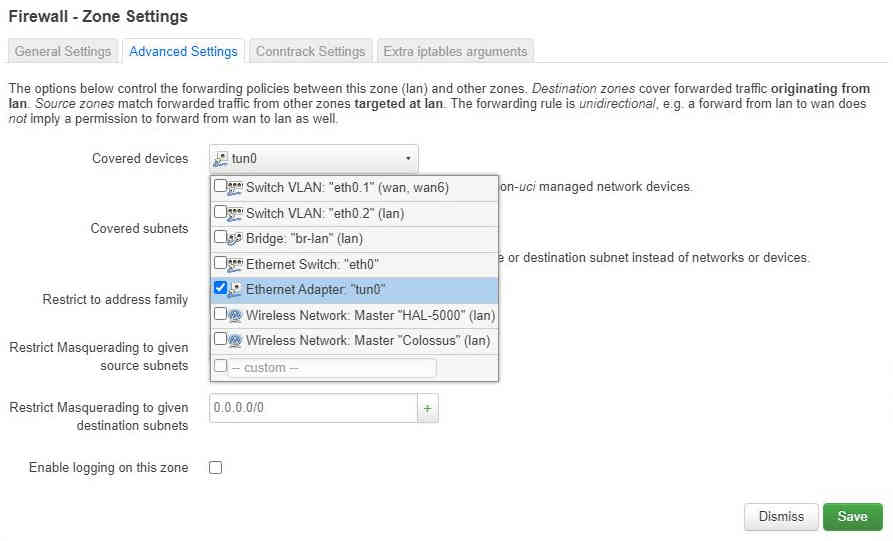
From the “Advance Settings” tab add tun0 to the covered devices:
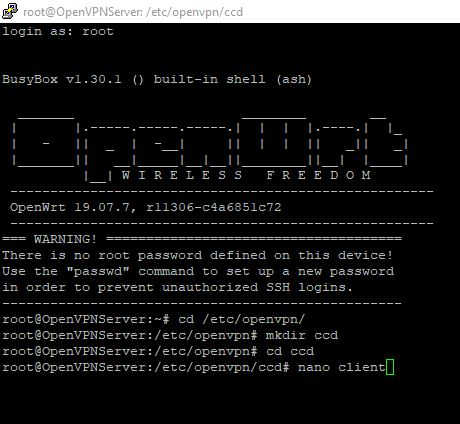
You should now find you can ping other devices on the 192.168.31.0/24 subnet from the client router. However, you still won’t be able to ping those devices from other computers connected to the client router as the server has no way of routing the return packets to the 192.168.8.0/24 subnet. A quick and dirty way to get around this is to add the TUN0 device to the WAN firewall zone. By default the WAN zone uses masquerading which make it look like the packets the client is sending is coming from it. However, as we are wanting to make a bi-directional site-to-site set up we don’t need to do this. Instead we can move our attention to allowing computers on the server “see” the computers on the client. To do this we first have to create a client configuration directory on the server. The easiest way is to once again SSH into the server and create a directory etc/openvpn/ccd and create a new file called client inside it:
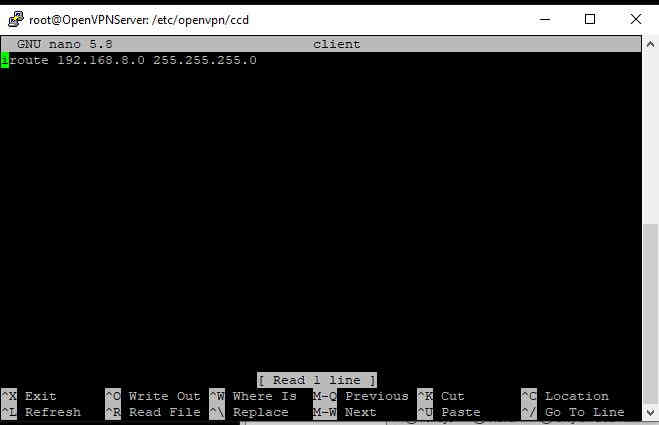
Then add the line iroute 192.168.4.0 255.255.255.0
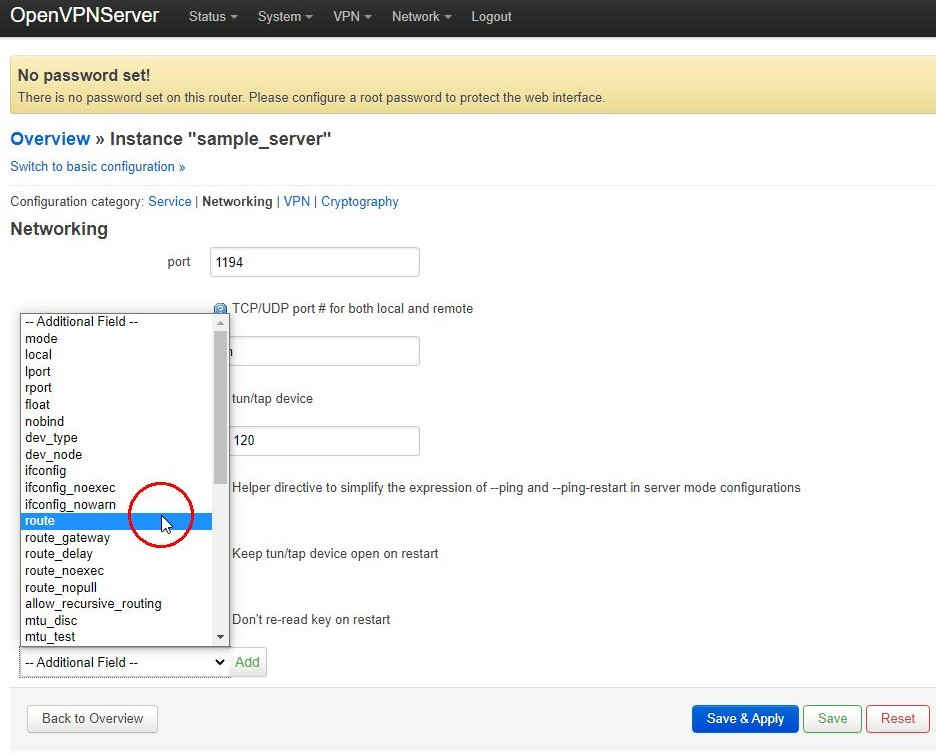
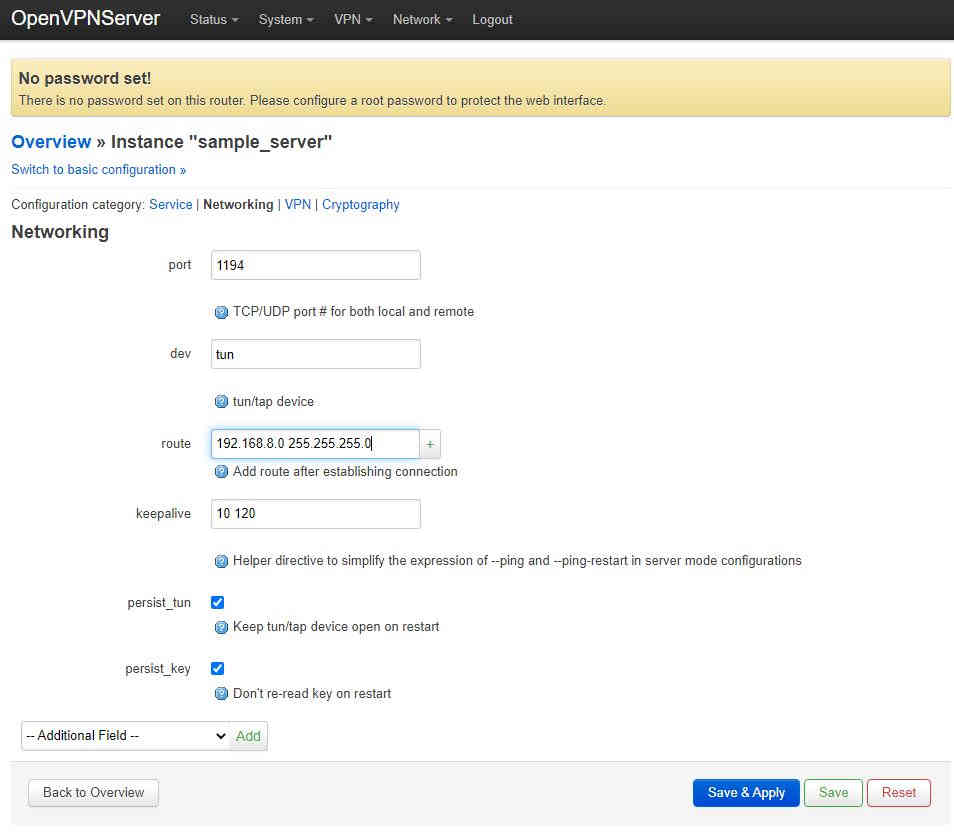
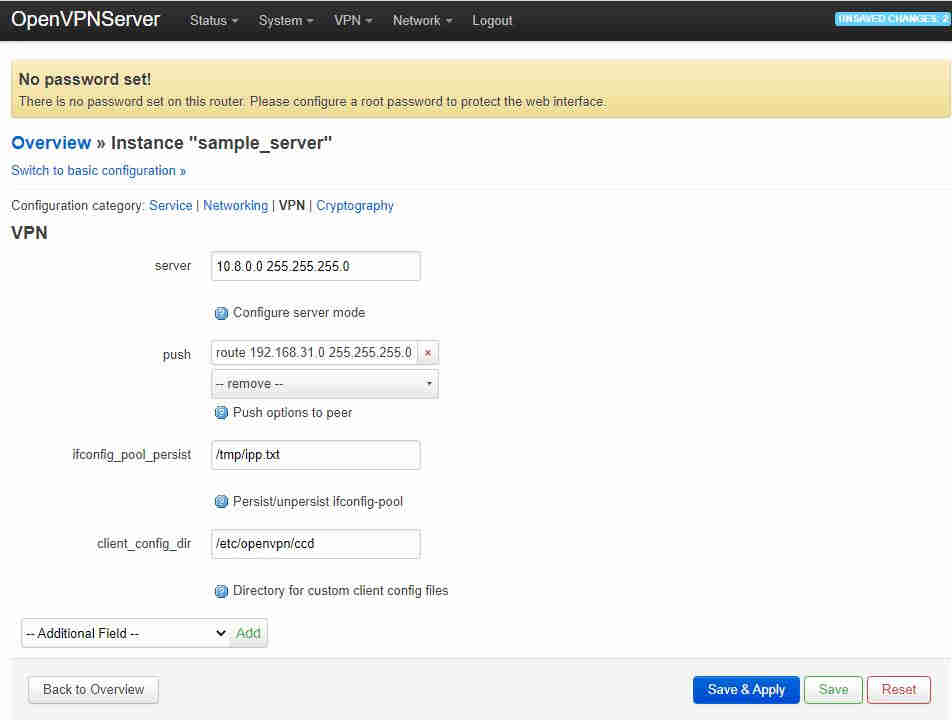
Next log back on to the server with a web browser and select VP→OpenVPN from the top menu and then edit the sample_server once more. Switch to advanced configuration then go to the Networking tab and add a route field:
then enter the network details of the client subnet:
you must click the “+” at the side for the text entry box and then “Save & Apply” before editing anything else! Next go to the VPN tab and a “client_config_dir” field which by default should already be filled in with etc/openvpn/ccd:
Finally to get everything working we need to add the TUN0 device to the LAN firewall zone on the client which is exactly the same as the way we added it to the server. Before final checking of everything working it might be a good idea to reboot both routers to make sure everything is refreshed. Once that is done verify everything is working by connecting to the wi-fi of the client router, SSH into a computer on the server and finally ping back to the first computer. To be informed about new articles on I Programmer, sign up for our weekly newsletter, subscribe to the RSS feed and follow us on Twitter, Facebook or Linkedin. 
Comments
or email your comment to: comments@i-programmer.info 
|
|||||||||||
| Last Updated ( Monday, 30 August 2021 ) |