| Android Programming In Kotlin: Getting Started With Android Studio |
| Written by Mike James | |||||
| Monday, 14 August 2017 | |||||
Page 4 of 4
Inspecting the XML
The designer will automatically generate the XML needed to create the layout for you and modify it as you change the layout. If you really want to see the XML then all you have to do is select the Text tab at the bottom of the designer window:
You should find it fairly easy to understand – read the <TextView> tag for example – but leave it to the designer to create and modify it. The quantities starting with @ are all references to things defined elsewhere in resource files, more of this in a later chapter. We will return to the designer and the XML it generates later. The KotlinIf you double click on the MainActivity.kt file, or just select the MainActivity.kt tab, you will see the code it contains. Some of the code might be hidden but you can inspect it if you want to by clicking the + button to expand it.
The important part of the code is:
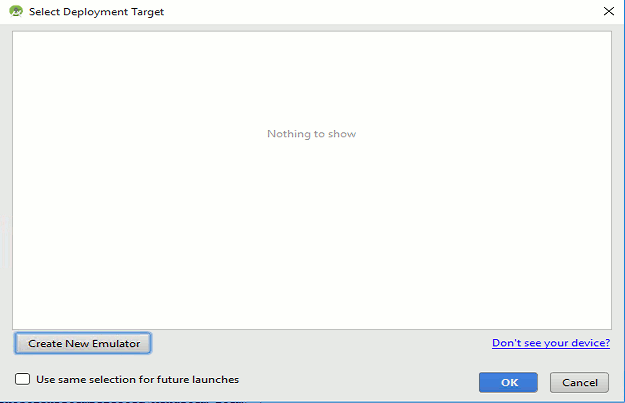
You can ignore the instructions that follow the setContentView function because these set up the standard "extras" that every Android application now supports – a floating ActionBar. There are two other functions below the onCreate function but ignore these for the moment. They implement features you didn't really ask for which can be useful, but not when you are just getting started. The onCreate function is the only thing that matters at the moment. This function is called when your app is run and it is expected to create the view and do the actions the Activity is concerned with. As our Activity doesn't really do anything much the only thing onCreate has to do is first call the inherited OnCreate method, super.onCreate, to do all the standard things and then use the setContentView function to select the XML file that determines the layout of the Activities screen. The line: is the most important of all and really the only one that actually does anything. It gets the resource object R that represents the layout as defined by the XML file created by the designer and makes it the current ContentView, i.e. it is what is displayed on the screen. In other words, it makes the connection between the layout you have defined using the designer and stored in the XML file, and the user interface that appears on the device’s screen. You may be puzzled as to why you edited a resource file called content_main.xml and yet the Kotlin is loading a resource file called activity_main.xml. The answer is that to make extending your app easier Android Studio creates two layout files, activity_main.xml that creates the "standard" controls that are displayed and content_main.xml that you use to design your custom UI. Of course, activity_main.xml contains a reference to content_main.xml. This makes things more complicated for the beginner but it is a simplification later. We have more to learn about the resource object R but you can see that its main role is to form a link between your Java code and the resources that have been created as XML files by the designer. As this is all our Activity does this is all the code we need. While I agree it is hardly an "activity" it is enough to see the basic outline of an Android app and to see how to get it running – which is our next job. Getting Started with the EmulatorThere are two distinct ways of running an Android app using Android Studio. You can use the emulator or a real Android device. Eventually you will have to discover how to run an app on a real connected Android device because the emulator only allows you to test a subset of things and it is slow. However, for the moment running your first app on an emulator is quite enough to get started. All you have to do is click the green run icon in the top toolbar – or use the Run,Run "app" menu item. When you do this for the first time it will take a while for the app to be compiled. Subsequent runs are much faster due to optimizations introduced in Android Studio 2. When your app is ready to be compiled you will see a dialog box appear which allows you to either select a running emulator or start one going:
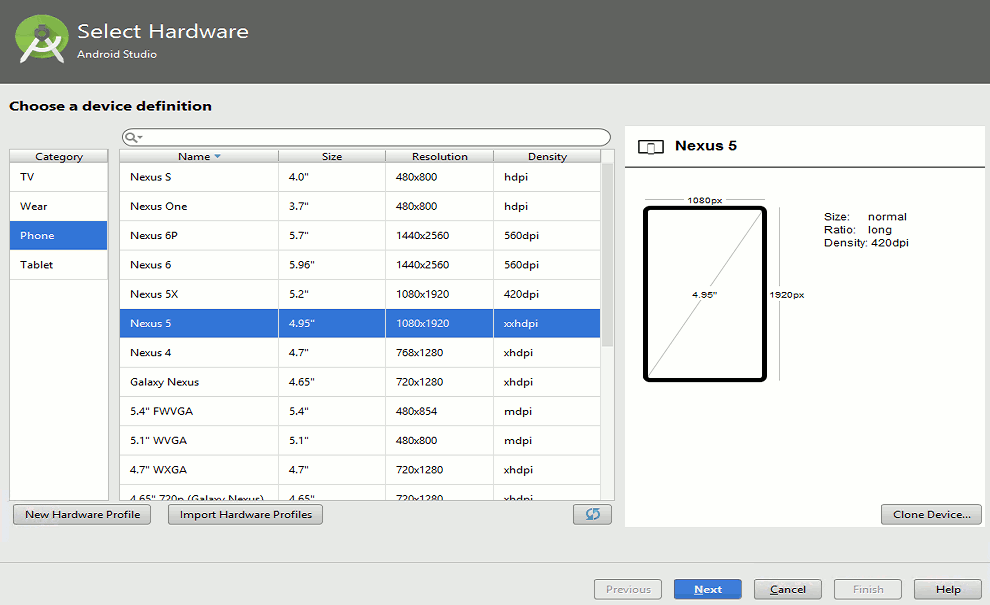
If no emulators are listed then you will have to create one. Select the Create New Emulator button. This will present a dialog box where you can select the device you want to test on. The default is the Nexus 5 running Nougat and for a first test you might as well use this. If you need other devices you can use the AVD (Android Virtual Device) Manager to define them. If you see a message on the right of the screen “HAXM is not installed” then it is a good idea to click the Install Haxm link just below. HAXM is an accelerator that is used on Intel machines to make the Android Emulator run faster. You don’t need it but it does speed things up:
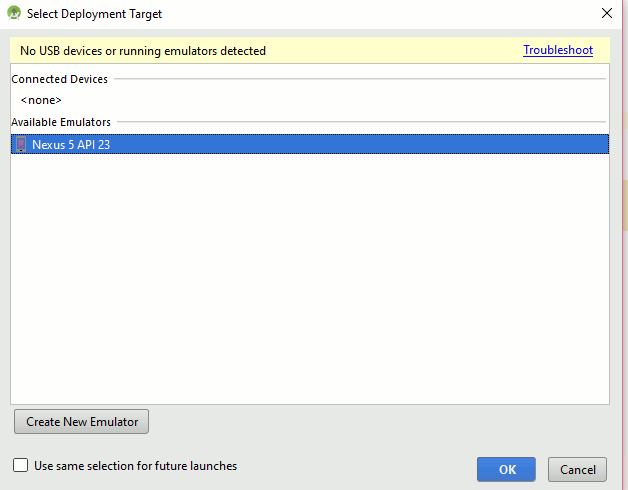
You can accept all of the defaults in this first run. You can monitor the loading of the emulation in the Run window which appears automatically at the bottom of Android Studio. You may see some warnings appear – these can mostly be ignored. The whole process takes some time the first time you do it. After the first time the emulator is already running and the instant run feature tries to re-run your app with the minimum changes:
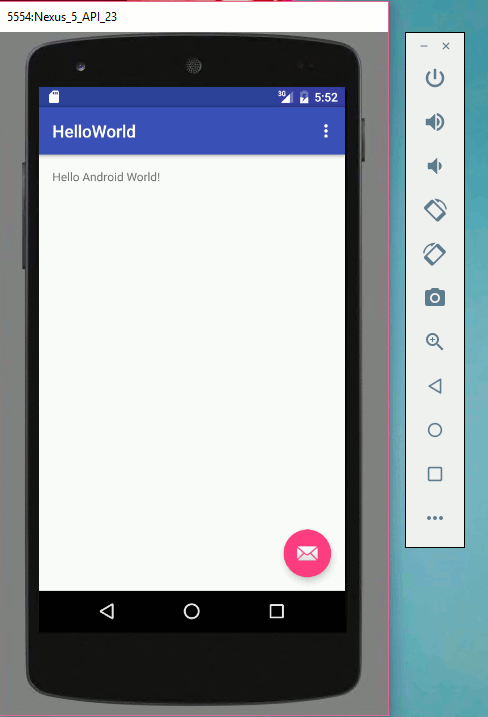
Finally, remember to wait until the Android operating system is loaded and you see the familiar home screen before you start to wonder where your app is. Even when it is loaded it is a good idea to give it a few seconds for Android Studio to notice it and to upload your app:
In our case this isn't particularly impressive – just the words “Hello Android World!”, but when you think of the journey traveled it really should impress. From this point you can now modify the code or the layout and run the app again to see the effects of the changes. If anything goes wrong and you get in a mess then simply delete the project and create it again from scratch. You still have a lot to discover about how to extend the app and make it useful, but the adventure has begun. Summary
Android Programming In Kotlin
|
|||||
| Last Updated ( Wednesday, 27 December 2017 ) |
