| Raspberry Pi And The IoT In C |
| Written by Harry Fairhead | ||||
| Monday, 28 March 2016 | ||||
Page 1 of 3 If you are working with an Internet Of Things application, C is the most natural language to program the Pi in. It gives you the fastest code and access to the entire system. So start here. Important Note:The whole of this book has moved to our sistersite There are a lot more chapters waiting for you there.
Raspberry Pi And The IoT In CBy Harry Fairhead The new edition of this book is now available:
 Buy from Amazon. All of the articles in this list are in the process of being updated from the first edition to the second edition. Chapter List
There are lots of ways to program the Pi from Scratch, through Python to assembler. Each language has its advantages and disadvantages but there are times when subtle arguments aren't necessary. If you want to program the Pi in a way that extracts the maximum efficiency and without any limits then C is the obvious choice. It is easier to program in C than in assembler and the results are almost the same in terms of speed. You can describe C as a machine independent assembly language and hence when you learn it you get deeper into the system than with other languages - you tend to really know what is going on. This makes it a good way to improve your understanding of computers and computing in general. Sometimes you don't need speed, even in an IoT application. For example, if you just want to flash a few LEDs or read a temperature sensor in a human time scale then you can write in almost any language. However, if you want to directly interface with other systems and control externally connected hardware at its full speed then C is your best choice. Similarly, if timing is critical, then C is the only way to go. Put simply if you can't make your application work fast enough in C then you probably can't in any language. You might be worried that you are some how trapping yourself in a low level language and will be unable to take advantage of sophisticated programming practices. Your get out clause is that C is a subset of C++ and you can break out of C anytime you feel like it and start writing code that has objects and all the trimmings of a modern language. Of course the code you write might not be quite as efficient as the C code you have had to give up but it is still fast. So C is worth learning. How do we get started? Getting Started In CYou can program in C in many different ways. All of the software you need to run a C program is already installed on a standard Pi running Raspbian. You can use an editor on the Pi to create your program and then compile and run it using the command line. However there are easy to use IDEs that make programming in C fast and painless and they provide debugging facilities that make finding bugs much quicker. You could use Genny, Eclipse or NetBeans - they are all open source but in practice NetBeans is the most powerful and this is the approach we are going to use. If you want to use one of the others or just a text editor and the command line then you can and everything described will work - but NetBeans is worth a try because the help it gives you with generating code and debugging will save you a lot of time in the long run. It is also open source and free to use. There are two distinct ways you can work with NetBeans and the Pi:
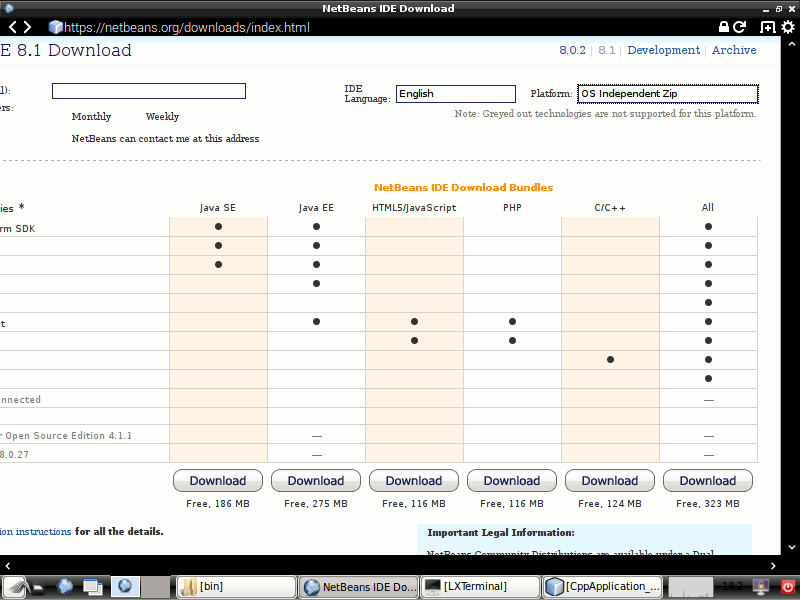
In both cases the Pi does the compiling and the running of the program. In practice the remote development approach tends to work better because the desktop machine has the power to run NetBeans fast. It also means that you can change the Pi that you are testing the code on very easily with all of the code stored on the desktop machine. This is very useful because you can try your program out on a range of Raspberry Pis and swap machines simply by changing the build host used for the project. The desktop machine can be a Windows, OSX or even another Linux machine. Before we can get down to work we need to find out how to set up NetBeans in both modes of use. NetBeans On Raspberry PiAs NetBeans is a Java program it will work on any machine that supports a Java Virtual Machine JVM and the Pi comes with one already installed as part of Raspbian. It is assumed that you have your target Pi set up with Raspbian and you either have a monitor, keyboard and mouse connected or you have an SSH connection. If you haven't reached this stage there are lots of introductory tutorials including my own: Real Raspberry Pi - Getting Started And Custom NOOBS As NetBeans is a fairly demanding program it would have to be a Raspberry Pi 2 or preferably 3. Getting NetBeans working is fairly simple. From the desktop first run a browser and navigate to netbeans.org. Find the download page and select: OS Independent Zip and the Language you want.
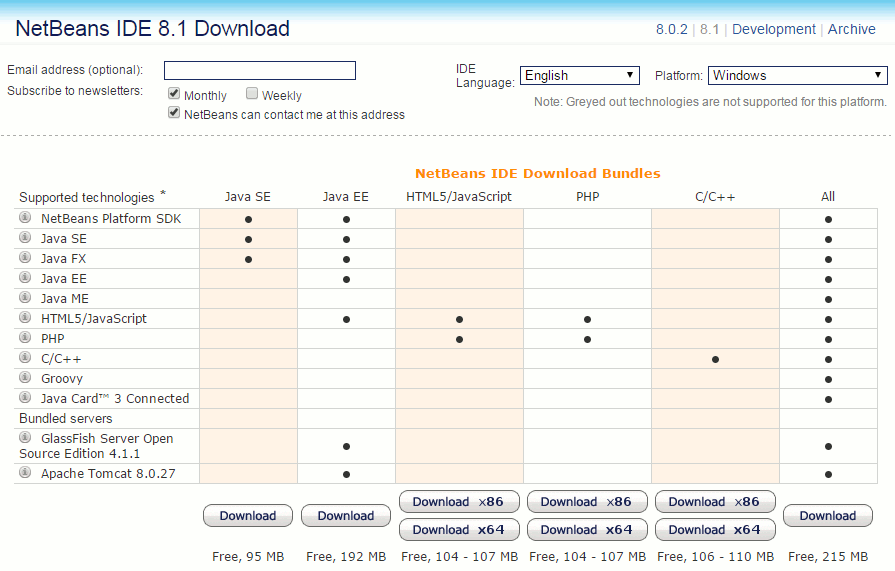
Click the download button of the version of NetBeans you want to work with. I recommend that you select the specific C/C++ version. The download is smaller and you don't get a lot of confusing additional features which have nothing to do with programming in C. You can always add additional language support at a later date. After the download is complete you have to extract the files in the zip to a suitable directory. If you are the only person going to use NetBeans then your home directory is suitable. Extract all of the files into the directory. Navigate to you home directory and then to netbeans/bin and run the file netbeans - this is a shell script that the first time it is run installs Netbeans and subsequently runs the IDE. Run it in a terminal, accept the licence agreement and wait while it installs. The other files in the directory are to insall NetBeans on a Windows or OSX machine. At this point you will have a working NetBeans IDE ready to create your first C program. Optionally you can add NetBeans to the Programming group in the menu. All you have to do is select Preferences, Main Menu Editor. Then select the Programming group and select New Item. Fill in the dialog that appears as shown:
The command is: /home/pi/netbeans/bin/netbeans adjusted to reference your home directory rather than user pi's if necessary. After this you can run NetBeans from the menu. NetBeans On A Remote MachineAlthough installing NetBeans on Raspberry Pi is easy and it works very well there are good reasons for installing on a desktop machine and using the Pi as a remote build server. The most obvious advantage is that the desktop machine is likely to be more powerful than even a Pi 3. In addition you can use the same code base and machine to program multiple Pis. All you have to do is change the IP address of the remote build server. It is assumed that you have your target Pi set up with Raspbian and connected to a network, a wired connection works best because it is faster but a WiFi connection works. You also need to make an SSH connection to the Pi - you can just make the connection using NetBeans but it is better to use an SSH client such as Putty under Windows. It is assumed you also know the IP address of the Pi you want to work with. If you can't make an SSH connection to the Pi then you aren't going to get NetBeans working remotely with it - so check that you can open an SSH terminal. The first step is to install NetBeans on the desktop machine you want to work with. You can do this by selecting the download that targets the correct OS - Windows, Linux x86/x64 or OS X. Again you can install one of the distributions that supports other languages but there are advantages of simplicity to just using the C/C++ version.
Once downloaded simply run the installer and you should have a fully working version of NetBeans on the desktop machine. Making the connection between the desktop installation and the Pi acting at the remote build server is described in the next section. |
||||
| Last Updated ( Thursday, 23 June 2016 ) |


