| Exploring Edison - In C |
| Written by Harry Fairhead | ||||
| Friday, 03 July 2015 | ||||
Page 1 of 3 You have a choice of languages that you can use with the Edison, but there are big advantages to choosing C or C++ for bigger projects. If you know Python or JavaScript then you will find it very easy to make the switch. So let's do it in C.
This is a chapter from our ebook on the Edison. The full contents can be seen below. Notice this is a first draft and a work in progress.
Now On Sale!You can now buy a print edition of Exploring Intel Edison.You can buy it from:
USA and World Amazon.com Chapter List
<ASIN:1871962447> Before we get started, it needs to be made clear why it is worth learning how to use the Edison in C. You can use languages such as Python and JavaScript and I have a great fondness for both. The reason for introducing another option is not about liking what you know - it is to do with efficiency. All of the system software on the Edison is written in C and Linux is written in C. What this means is that C programs have a direct and uncomplicated connection to the system software. This makes C programs simpler and faster and if you are writing an application using embedded hardware then speed is usually an issue. As well as speed, there is also the issue of timing. For many applications you have to be able to create a pulse of a known duration and within a specific time slot. The standard approach to Edison programming, i.e. using the Atom processor, isn't good enough for this task because Linux isn't a real time operating system and this introduces uncertainties into pulse timing. In situations such as these you have little choice but to move to programming the second CPU on the Edison board - the MCU. The MCU can, at the moment, only be programmed in C so if you want to future-proof your investment in the Edison, C has a lot going for it. To summarize:
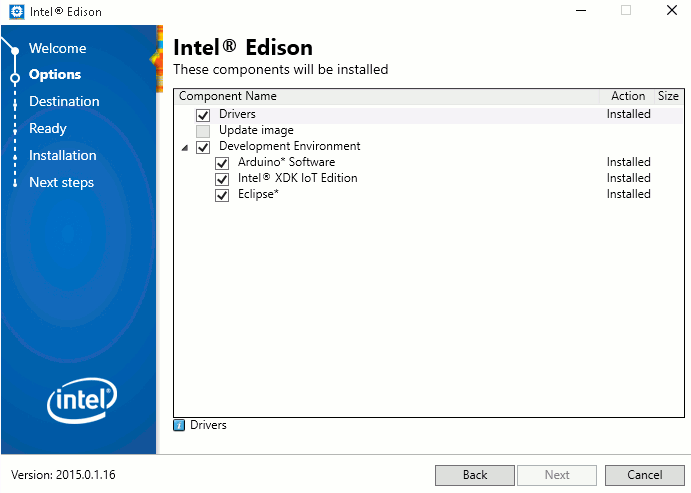
Installing EclipseTo write programs in C for the Edison the simplest way of working is to install and use the customized version of the Eclipse IDE provided for the Edison, the Intel System Studio IoT Edition, which can be downloaded from: https://software.intel.com/en-us/iot/software/ide Eclipse is a well known IDE to Java programmers, but it is modular and can be customized to work with other languages. Intel has created a version of Eclipse that can be used to create C programs for the Edison and run and debug them very easily. You might outgrow the Eclipse approach, but it is very much the easiest way to get started. If you have used the Integrated Installer for Windows 64 then one of the options is to install Eclipse. You can rerun the installer if you want to add Eclipse to your current setup or if you need to refresh it.
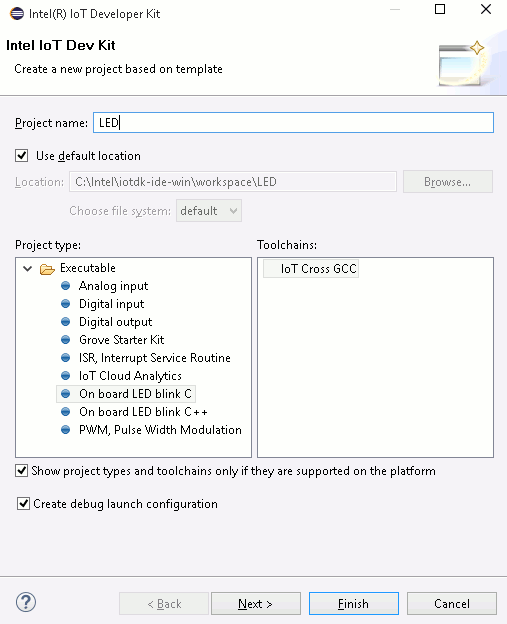
If there isn't an integrated installer for your OS then you can download Eclipse from the main IoT download site: https://software.intel.com/iot/downloads If you have to install Eclipse manually you will need a copy of 7Zip for Windows and you will have to download, extract and run the installer. You also need a copy of the Java Runtime Engine because Eclipse is a Java program. When you run Intel System Studio IoT Edition make sure you start it via the batch file devkit-launcher.bat - this is what sets up the standard version of Eclipse to run the IoT extensions. If you start it by running Eclipse.exe then the IDE will start but you wont have the IoT extensions installed. The batch file is linked to via the Eclipse icons that the installer creates. A First ProjectWhen you first start Eclipse you will see the Intel IoT Developer Kit window. This is where you do everything that is specific to programming the Edison. If you need to see the IoT Developer Kit at any time just use the command Help,Intel IoT Developer Kit and the window will open. You can also pin the window as a sidebar in Eclipse so that you can see it all of the time. A good place to start is the Hello World of IoT - blink an LED. In this case all we need to do is slect Create C/C++ IoT project and then select On board LED blink C and call the project LED or whatever you would like to call it.
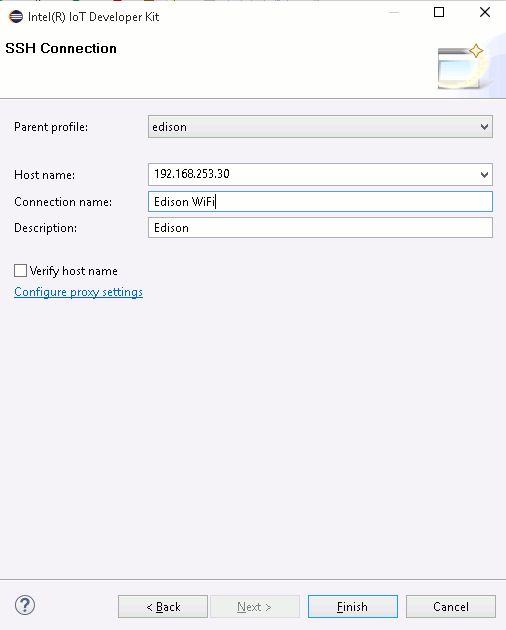
At this point you might be a little puzzled as to what "On board LED" means. After all the mini-breakout board doesn't have an on board LED but the Arduino breakout board does. There are very few examples of using the mini-breakout board but this isn't a huge problem as we shall see. Don't click Finish, instead click Next. You have to tell Eclipse how to connect to your Edison so that the program can be downloaded and run. All you have to do is enter the IP address of the Edison. If you have setup the WiFi then this connection will do the job perfectly, but there are other ways to connect an Edison to the Internet and these all work as well. Enter the IP address, a name for the connection and a description if you want to:
At this point you could start programming, but it is worth checking that you do have a connection. This is also an opportunity to discover how to edit and make use of connections. |
||||
| Last Updated ( Thursday, 12 May 2016 ) |