| Android Programming In Kotlin: Getting Started With Android Studio |
| Written by Mike James | |||||
| Monday, 14 August 2017 | |||||
Page 2 of 4
Your First ProgramIf you have already created some programs you might well see them listed in Recent projects. Assuming this is your first project select the option:
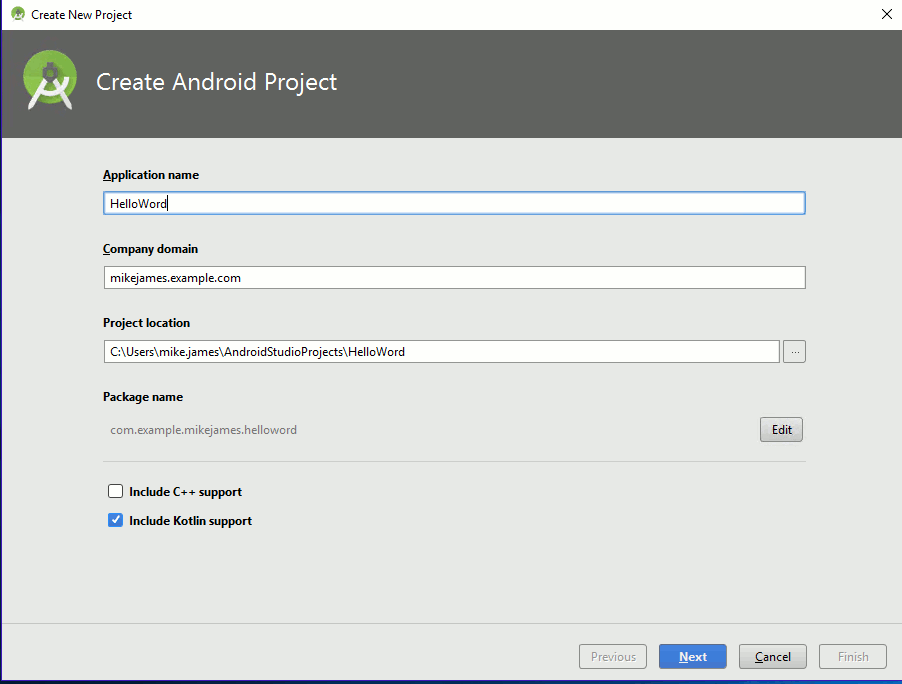
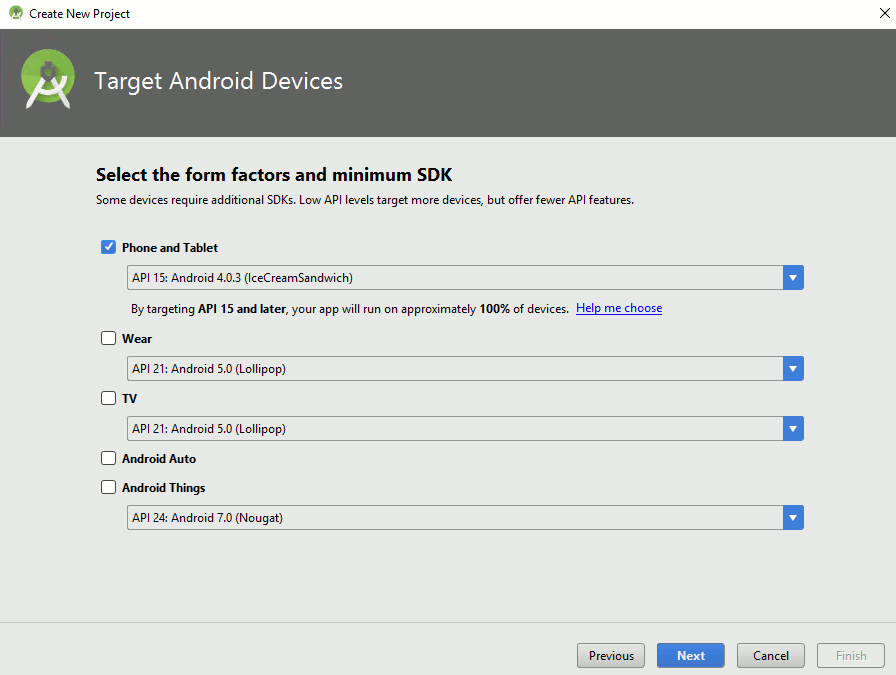
You can ignore the details of the new project for the moment. All you have to do is supply a name for your application - HelloWorld in this case. Also make sure you have "Include Kotlin support" ticked – this is what makes the project use Kotlin rather than Java. Accept the other defaults that Android Studio has filled in for you. When you click Next you are given the chance to pick what devices you are targeting. Again simply accept the defaults:
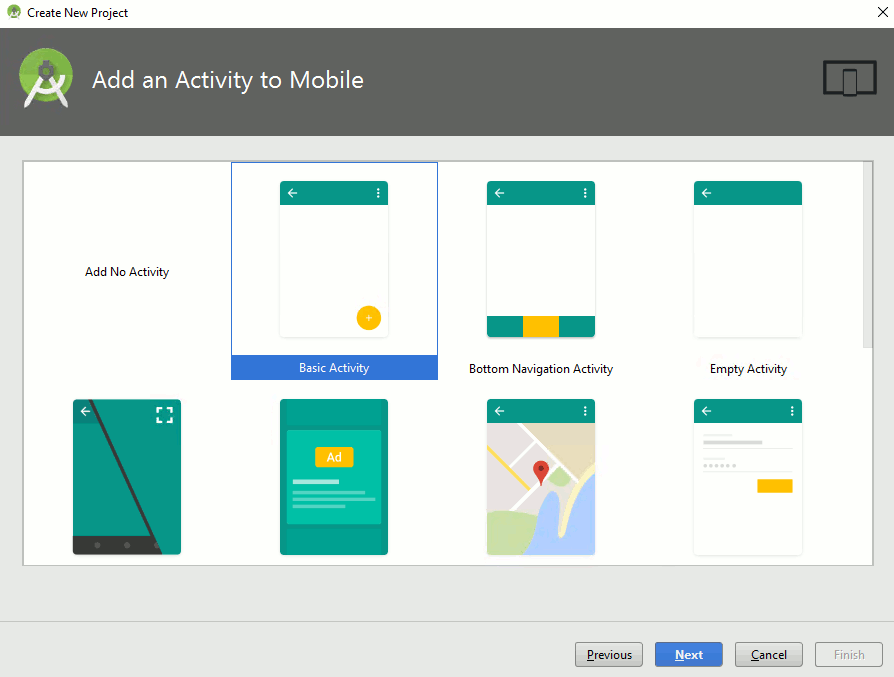
Most of the time you will want to create apps that run on a version of Android that captures the biggest market but if this isn't a concern then it can be better to select a more recent Android version. The next page lets you select a template for your project. In this case change the selection to Basic Activity. This gives you some additional generated code which makes the app easier to create an app that looks right. Every Android application consists of at least one Activity and this template generates a project with a single Activity ready for you to customize:
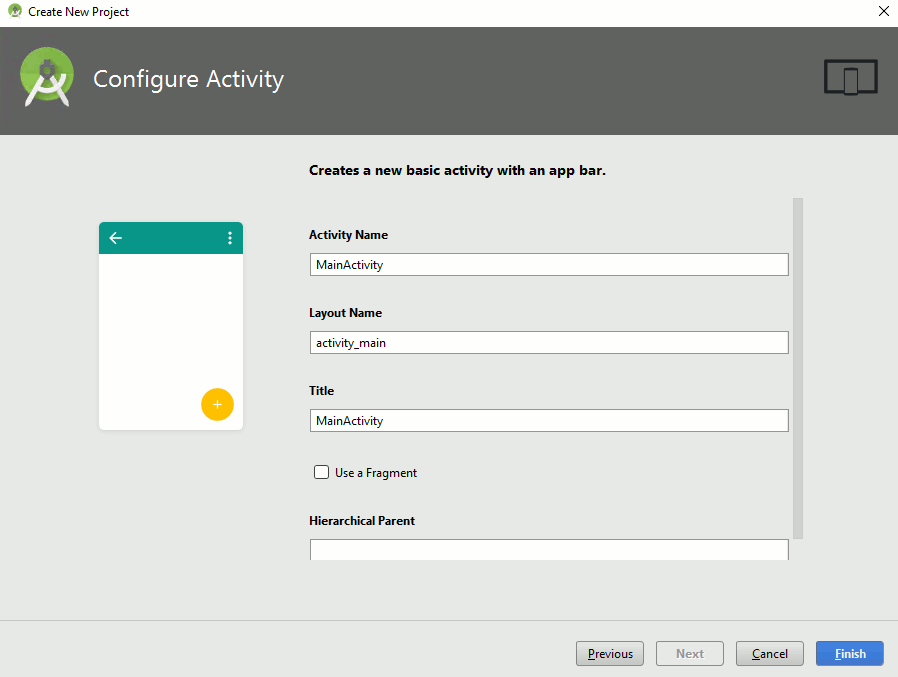
On the next page you can assign custom names for the various components of your project that the template generates. For a real project you would assign names that were meaningful but in this case you can accept the defaults:
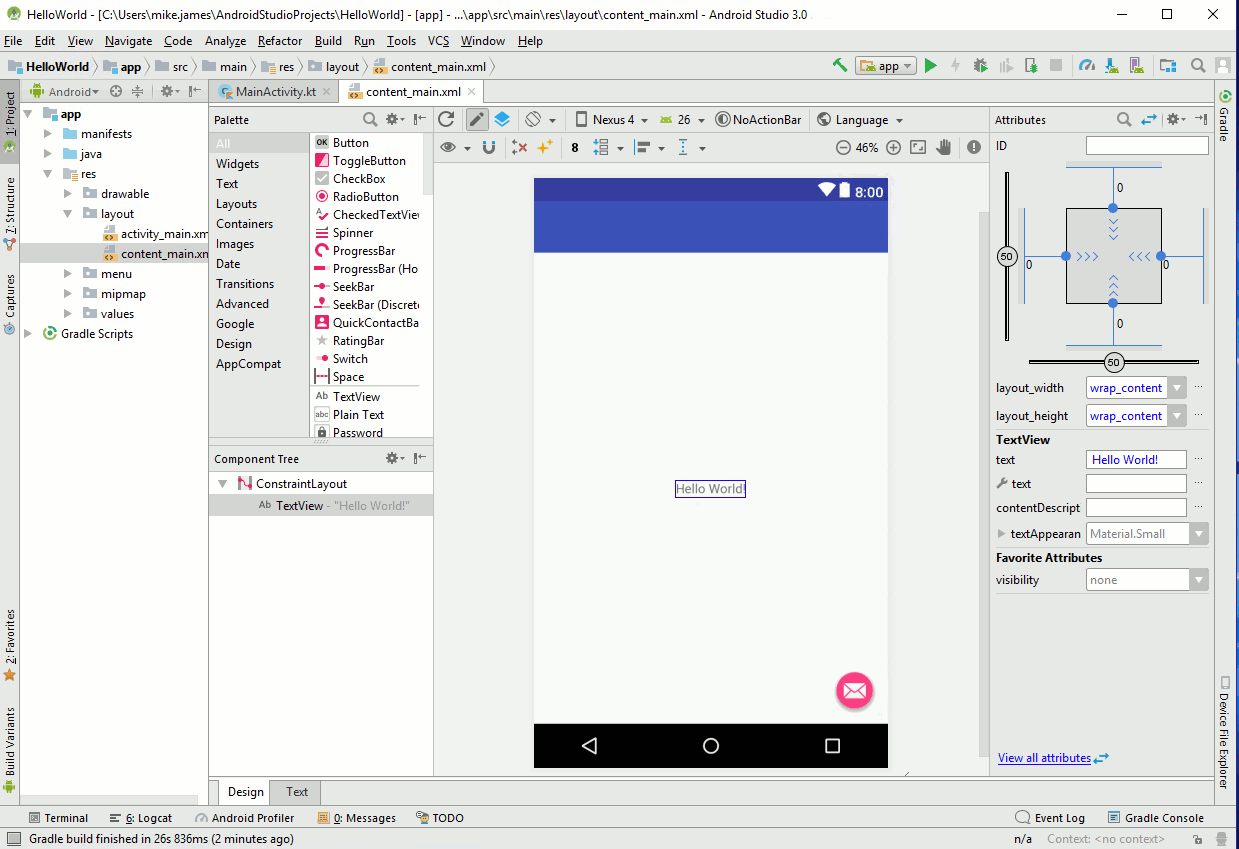
Finally you can click the Finish button and wait as Android Studio creates all the files you need. Even a simple Android project has lots of files so again it all takes time. First LookWhen everything is ready you will see Android Studio for the first time. Problems?If you get any error messages then the chances are that your project hasn't finished being processed. Wait a little while longer for the activity to stop. If you look at the status line at the bottom of the window you will see a message saying “Gradle Build Finished” when Android Studio has finished with your new project. If you still have problems it is worth trying the command: This usually works for "Missing styles" and similar errors. The IDEAlthough there looks like a lot to master in Android Studio's user interface, most of it you will only visit occasionally. The key things to notice are that moving from left to right you have:
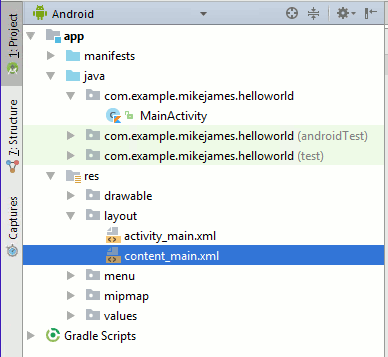
Most of the time you will be using the Project window and the Attributes window. Between the two you will see different editors depending on what sort of file you have selected. In this case you have by default a layout file, content_main.xml, selected and hence you have a layout editor in the middle of the screen. Before we go into layout, which is one of the main topics of this book, it is important that you know a little about the file structure of a project so that you can navigate to its different parts. Basic Project StructureWhen the project has finished building all of the files created can be viewed by opening the Projects tab. The main thing to notice is that there are a great many folders and files:
It seems almost unbelievable that the simplest Android app you can create involves so many files. Don't panic. Most of the files that have been created are auto-generated and most of the time you don't need to know anything about them, let alone open or edit them. In fact opening and editing auto-generated files really isn't a good idea. So let's focus on the files that matter to us. For our simple program there are only two important files. One of them determines the behavior of the Activity: MainActivity.kt The other determines the visual appearance, or View, of the app: content_main.xml You can set which Activity is the one that the system starts, but by default it is the single activity that you created and named when you set up the project. You can change the default names, but for the moment leave them as they are. The java directory, despite this being a Kotlin project, is, from your point of view, where most of the construction of your app occurs so make sure you know where it is. The res directory is where you store all of the resources, layouts, bitmaps, etc, that your app needs. So while things look complicated at the moment the only two project files that matter to you, and your project, are MainActivity.kt in the java folder and content_main.xml in the res folder. The two other folders in the java folder are concerned with creating tests for your program. This is not something that we need to worry about when first starting to write Android apps. |
|||||
| Last Updated ( Wednesday, 27 December 2017 ) |

