| Android Adventures - Custom Dialogs Using DialogFragment |
| Written by Mike James | |||||
| Thursday, 19 June 2014 | |||||
Page 3 of 4
We also need to define the event handlers. In this case all the event handlers have to do is record the status - has the OK or the Cancel button been selected. To do this we need an private field:
With this in place the event handlers are simply:
Notice that each of the event handlers calls the Activity's event handler to update it and ends with dismiss. Notice that it actually doesn't matter where you place the dismiss in the event handler. The dismiss method uses the FragmentManger to remove the DialogFragment and this makes use of a transaction which only executes once the event handlers terminate and release the UI thread. That is the actual dismiss operation only occurs after the event handler that uses it terminates. The onDone function is provided by the Activity using the Fragment Interface pattern described in chapter 9. That is onDone is a method belonging to the Activity that the DialogFragment is currently attached to. Calling dismiss is the correct way to close the dialog when the user is finished with it. In this case selecting either option closes the dialog. If there are other controls in the dialog they might not need to dismiss the dialog after the user interacts with them but the event handlers that do dismiss the dialog box have to gather the dialog's data if necessary and then dismiss the dialog. What we have to do is to now us define an interface that the Activity has to implement to use the dialog. In this case this is simple:
Of course you can name the interface and its function what ever you want as long as you are consistent. Now we know that the Activity will have an onDone function and we need to get a reference to it when the DialogFragment is attached to an Activity. Notice that the whole point is that the DialogFragment could attached and detached from Activity's many times in the course of the program. So the onAttach event handler has to try to retrieve the interface defined in the Activity and if it fails it has to complain:
Of course we need mListener:
and we need to remember to remove the reference to the interface when the DialogFragment is detached from the Activity:
Note: do not be tempted to handle the dialog's exit using the onDismiss event as you might in other languages and Frameworks. This can be called without a prior onAttach and when this happens the mListener variable will be null and trying to use the Activity's callback will result in a runtime error. For completeness here is a listing of the DialogFragment:
That's it the DialogFragment is ready to use. All we have to do now it add some code to the Activity to use it. We need to hookup the Button in the Activity to show the dialog:
and the onClick function is:
Finally we need to implement the interface that the dialog demands:
You can use Android Studio to generate the interface implementation in the usual way. All that onDone does is to show the state of the dialog in the TextView:
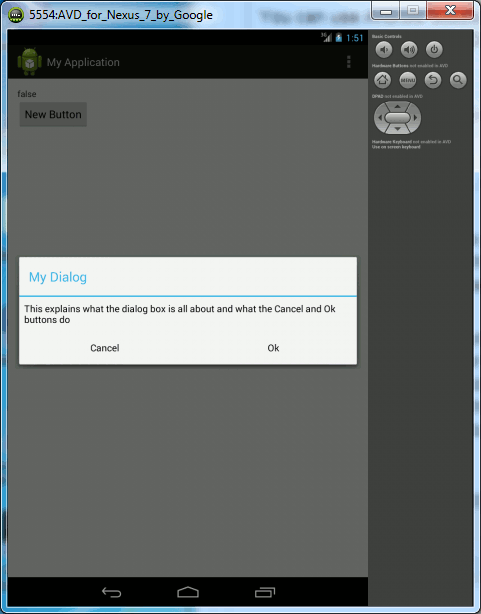
Now we can try running the program. You should see the dialog appear when you click on the apps one and only button and you should see true when you select the OK button and false when you select the Cancel.
Note that if you dismiss the dialog by clicking on the Activity or using the back button nothing is updated in the Activity. Try rotating the emulator and notice that the dialog persists and is still on display when the Activity has been recreated. |
|||||
| Last Updated ( Saturday, 25 July 2015 ) |
