| Getting Fit with Excel |
| Written by Janet Swift | ||||
| Tuesday, 20 April 2010 | ||||
Page 3 of 3
Extending the recordAs well as recording the amount of exercise we need some evidence of fitness improvement so let's add the some performance indicators. The one's we'll use in a later project are:
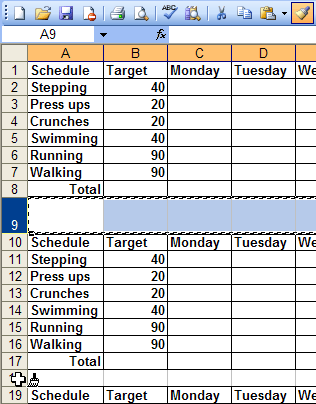
You can of course substitute alternative stamina and speed indicators - but you'll need to include them in the Record Card. We are going to add one performance indicator for each activity. Leave column J empty but reduce its width to produce a narrow gap, Enter "Best Performance in Week" in K1. Bold has automatically been applied but add underlining using the U icon in the Formatting bar. Type "Number before break" in K2 and then Copy this entry to K3 and K4. Excel provides many ways to copy and for each there is a corresponding paste operation (see below) but to repeat this text twice more the easiest option is to drag down on the Autofill handle. Now type "Time for mile (secs)" in K6 (Running) and copy this into K7 (Walking). You may not want to swim a complete mile (and if you do want to you would probably record it in minutes), so having copied the same label into K5 edit it by selecting the cell and pressing F2 which provides you with a text cursor inside the cell so that you can replace the word "mile" by "length". Adjust the width of column K to accommodate the text in K2 but leave the text in K1 to spill over into L1 as that cell is going to remain blank. Finally, to give you boxes to fill in select L2:L7 and use the Borders drop down and select the Border option. Save and printYou can now print out the record card to fill in away from the computer. You'll want multiple copies so to save paper select the area A1 to L8 and copy it. There are four methods to do this:
Then place the cursor in A10 and issue the paste command with the method of your choice:
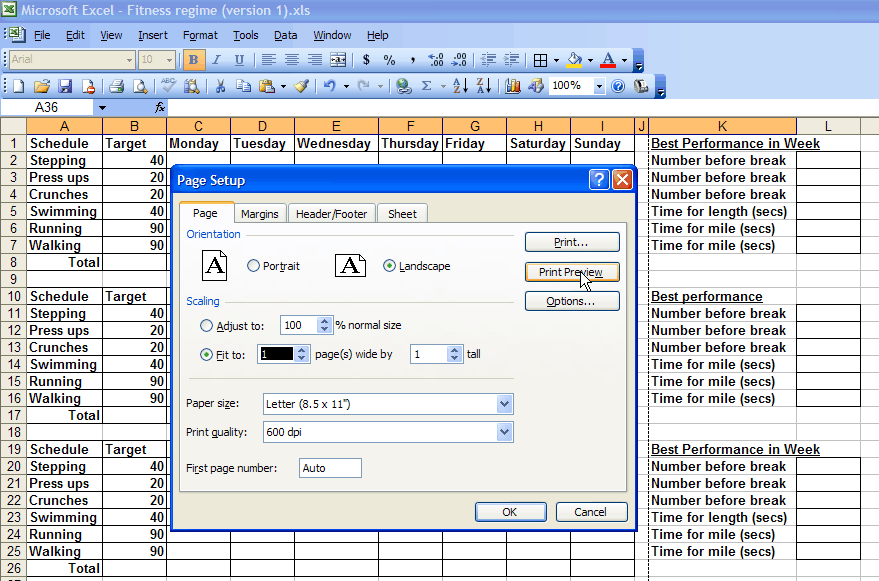
The copied cells remain on the clipboard so you can repeat the paste operation to A19 and A28. The intention here is to print four record cards on a single sheet of paper - however if you simply click on the Print icon you'll obtain two pages. The remedy to this is to use the paper in landscape orientation. (Click inside picture to expand it) To do this drop down the File menu and select Page Setup. In the dialog box click the Landscape button in the Orientation Section and Click the Fit to button with a value of 1 for both wide and tall. To make sure this works use Print Preview first. In this view you can adjust the margins by clicking Margins in the bar across the top and then dragging on the guidelines that appear.
(Click inside picture to expand it) This preview reveals that the four copies fit but we could do with a wider gap between each of them. This is easy to achieve by altering the row height. This can be done interactively with the mouse in a similar way to adjusting column width. Place the cursor between rows 9 and 10 and drag down to produce the desired gap. You can then "copy" the gap using the Format Painter in the toolbar, making a single copy if you click and multiple copies if you double click.
With row 9 selected - including the row label - double-click on the Format Painter icon. This changes the cursor and you click with it on the row labels 18 and 27. When you have fininshed click again on the Format Painter icon. When you are satisfied with the layout Save your spreadsheet and print it using the Print icon, File Print or the keyboard shortcut Ctrl+P. Once you have at least one week's data you can continue to Part 2 where we create a progress chart. If you want to see an example version of the Excel spreadsheet so far download Fitness1.xls. 
|
||||
| Last Updated ( Sunday, 09 May 2010 ) |