| The Minimum Spanning Tree In C# - Prim's or Dijkstra Algorithm |
| Written by Mike James | |||||
| Sunday, 06 October 2024 | |||||
Page 3 of 4
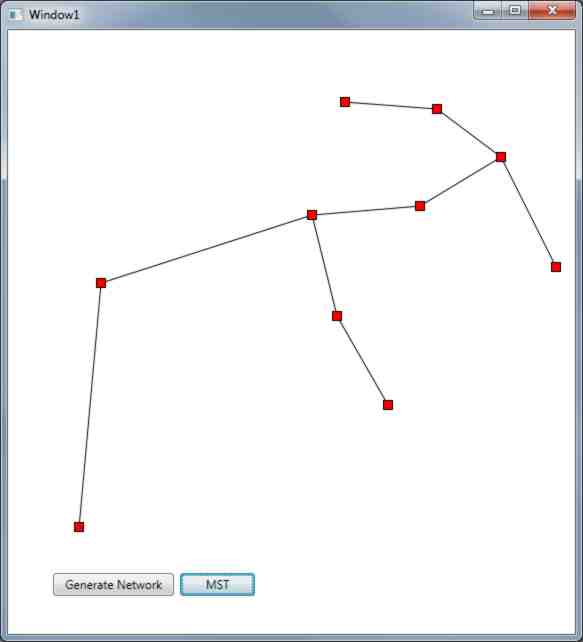
Implementing Prim's algorithmNow we have to move on to implement Prim's algorithm proper. As well as just implementing the method, an animated display will be used to show the paths as they are being considered for inclusion. Place a second button on the form and change its caption to "Find MST". It's click routine is simply
The work is all done by the prims function. The first thing we need are two arrays to store the list of vertices that have been included and are still to be processed:
We also need another network array to hold the distances that form the minimum spanning tree:
Two integer variables are used to hold the start and finish node numbers of each path added to the tree:
The two arrays need to be initialised:
At the start of the algorithm all of the vertices are excluded, i.e. vertices 0 to size-1, and none of the vertices are included, i.e. all entries -1. Notice that -1 is used to flag the fact that there is no entry in the array. The first point in the MST is selected at random:
Notice that the vertex that has been added to "included" has to be removed from "excluded" by setting that element to -1. At last we can start the loop that finds the closest vertex to the currently included set and adds it to "included".
where start and finish are the indices of the vertices of the path that is to be added to the tree. That is finish is the closest of the currently excluded vertices and start is the vertex in the included set it is closest to - adding the arc from start to finish to the MST. To be clear, the function closest finds the closest vertex listed in the excluded array to any of the vertices listed in the included array. The end point of the path is the new vertex that has to be added to the included set, i.e the vertex indexed by start is already in the included array:
and hence removed from the excluded set:
The distance associated with the path also has to be added to the "finished" array to indicate that it has to be drawn as part of the MST:
and the finished array has to be made symmetric just in case someone wants to make use of the upper triangle rather than the lower:
and finally we can show the finished MST:
All that is needed to complete the program is the "closest" function:
This is essentially a search loop for the smallest value but it has to take into account whether the vertex is valid or not. A vertex that isn't in the excluded list isn't valid and one with a zero distance isn't connected to the node in question and once again isn't valid. Apart from this complication each node in the excluded list is used to find the smallest distance. If you put all of this together and run the program you will discover that not only can you generate random graphs but also their MSTs. You can learn a great deal by watching it. If you press the "Find MST" button again the whole process is repeated from a different starting point. Notice that the MST isn't unique so if you discover that starting from a different vertex gives you a different MST this isn't an error.
You can add additional facilities to this program quite easily. For example, a display of the total length of the MST would be interesting and a slider control to modify the number of arcs would also be worth the effort. You could also animate the display to show the arcs being selected one at a time. If you would like the code for this project goto CodeBin. <ASIN:B09FTLPTP9> |
|||||
| Last Updated ( Sunday, 06 October 2024 ) |
