| Custom Bitmap Effects - Getting started |
| Written by Administrator | ||||||||||
| Tuesday, 01 June 2010 | ||||||||||
Page 3 of 3

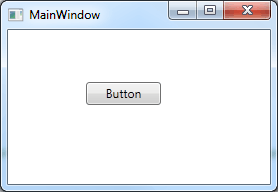
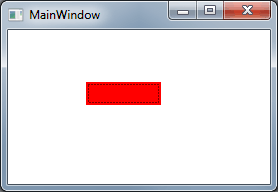
The custom effectNow that we have the HLSL pixel shader compiled correctly and stored as shader1.ps in the Shader directory we can write the C# to make use of it. First we need to add: using System.Windows.Media.Effects; at the start of the project. To create a custom effect you have to create a derived class from ShaderEffect: public class BlankEffect : ShaderEffect The very minimum that this has to do is to create an instance of PixelShader that wraps your shader code and store a reference to this in the new classes PixelShader property. This is most easily achieved in the constructor: public BlankEffect() This first creates an instance of PixelShader, sets its UriSource property to the location of the shader1.ps file and then sets the BlankEffect PixelShader property to reference the new instance. That's all you have to do to create a custom effect. Now we can try it out. Add a button to the form and change its Click event handler to read: private void button1_Click( If you now run the program and click on the button
the result should be a red rectangle where the button should be displayed.
As admitted at the start of this article this isn't exactly impressive but, if you think about the complexity of the steps we needed to take to get to this stage, the fact that it all works is very impressive! Remember if you want to make any changes to the shader you have to edit the .fx file, save it, compile it to generate the .px file and then run the project again. Now with the mechanics of editing, compiling and using an HLSL program we can move on and learn more about how pixel shaders work and more about writing HLSL. We will have to modify the new C# class to take account and make use of the features we introduce, but the basic ideas and procedures remain unchanged. How to write a more complex shader and generally make progress with HLSL is described in: Custom Bitmap Effects - HLSL If you would like to know when the next article on WPF HLSL is published register with iProgrammer or follow us on Twitter.
|
||||||||||
| Last Updated ( Monday, 14 June 2010 ) |