| Getting started with MIT App Inventor |
| Written by Mike James | |||||
| Monday, 12 November 2012 | |||||
Page 1 of 4 Although App Inventor is sometime described as an educational toy that you can use to get kids interested in programming don't let this fool you into thinking that you can't do real things with it. It makes a very good prototyping facility - as we discover here.
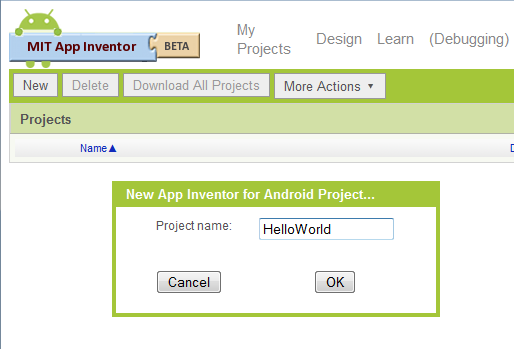
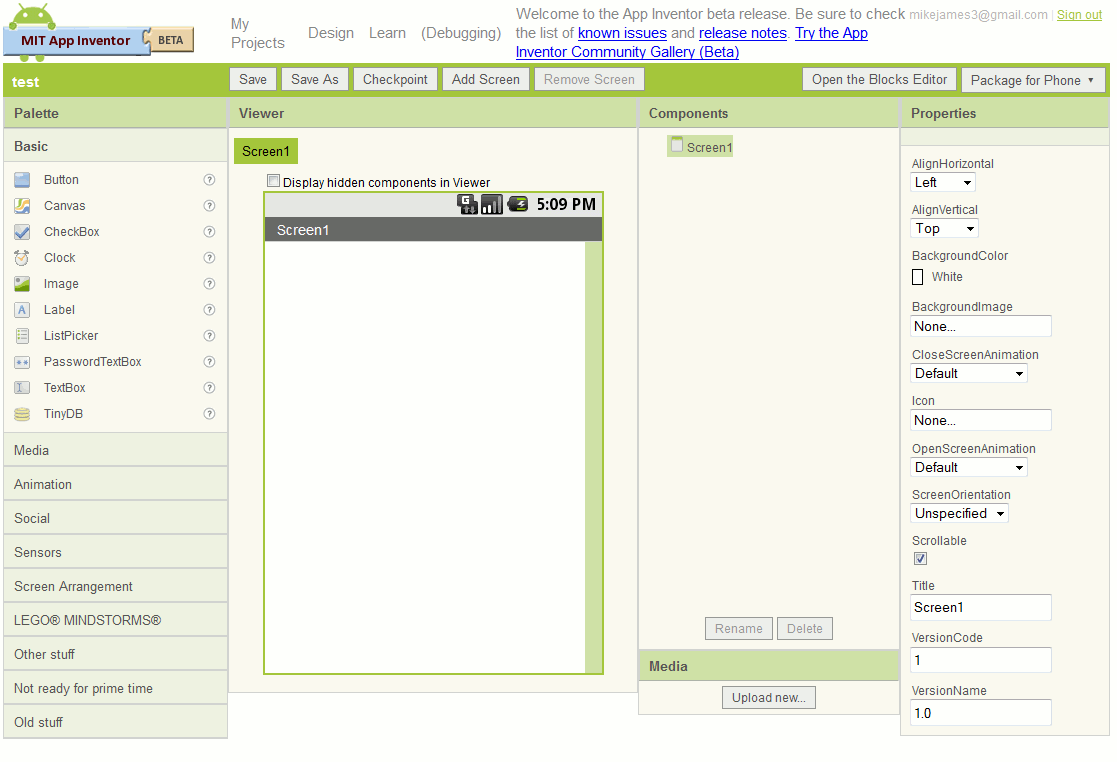
App Inventor is an amazing way to create Android applications. You don't need to be able to program but if you can then all the better. All I can say is that as a programmer this is the first time in quite a while that a development environment and its associated "language" has brought a smile to my face. It's not perfect, it's still in beta, but if you give it a little room to grown on you might just smile as well. Although App Inventor is sometime described as an educational toy that you can use to get kids interested in programming don't let this fool you into thinking that you can't do real things with it. It makes a very good prototyping facility and a couple of the prototypes that I have created have actually ended up as final apps that are still in use. Getting startedThe worst part of trying any new programming environment is having to download and install things. For the App Inventor this is less of a problem because a lot of it is designed as a web application. To use it you need a Google account - if you don't have one it is worth signing up. However some of the system does run on your local machine - the Android emulator and the designer. These are both Java applications and so your first task is to make sure that you have an up-to-date Java 6 (also known as 1.6) installation. You can check by clicking on the following link: Java test page. After checking that you have Java installed you need to download the installer appropriate for your operating system - Windows, Linux or MacOS X. I used the Windows version. Once the installation is complete you are ready to start using the App Inventor. If you have had an older version of App Inventor installed on your computer it is a good idea to install the most recent version. Don't worry at this stage about things like a USB driver for your phone or tablet the simulator is the best way to get started and there are other ways to get your app onto your real phone without a USB driver. To get started go to http://beta.appinventor.mit.edu If you are already signed in to Google you will be able to go straight to MyProjects - if not sign in and click MyProjects. The MyProjects section saves all of the apps you create for further use. When you are learning a new system there is a lot to be said for the simpler the better. So lets create a Hello World app. Hello WorldMove to My Projects and click the New button. Enter HelloWorld and click the OK button. After a few moments you should see the App Inventor Designer window open. Anything you create using the App Inventor under the project named HelloWorld will be saved under your account for you to use the next time you log in.
Before getting started you need to know that the Designer, as its name suggest is used to design and create the user interface of your application. If you have used a drag-and-drop designer for any other programming language this will be nothing new to you apart perhaps from the fact that it is hosted on the web. Notice that the designer doesn't provide any behavior for the user interface you create - this is all done using the Blocks Editor which is the second member of the team. So to sum up:
and
We will come to the Blocks Editor in a moment. For now let's just design a simple UI - in fact the simplest UI that can be made to do something. The DesignerThe Designer is split into four regions -
<ASIN:1449397484> <ASIN:0321812700> <ASIN:1840785284> <ASIN:1119991331> <ASIN:1849692122>
|
|||||
| Last Updated ( Monday, 12 November 2012 ) |

