ESP32 In MicroPython: Client Sockets
Written by Harry Fairhead & Mike James   
Tuesday, 12 September 2023
Article Index
ESP32 In MicroPython: Client Sockets
Client Sockets
SSL Socket-Based HTTPS Client

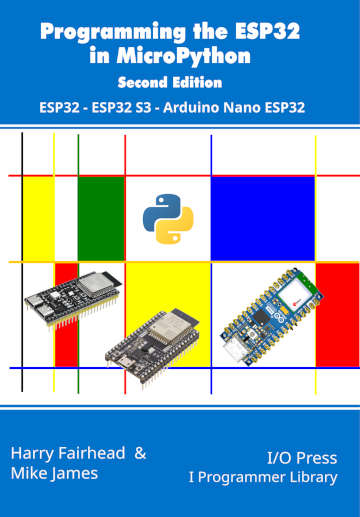
Sockets are the basis of communication over the internet. This extract is from Programming the ESP32 in MicroPython, part of the I Programmer Library and it shows you how to get started with sockets to implement HTTP and HTTPS clients.

Programming the ESP32in MicroPython

By Harry Fairhead & Mike James

esppython360

Buy from Amazon.

Contents

       Preface

  1. The ESP32 – Before We Begin
  2. Getting Started
  3. Getting Started With The GPIO 
  4. Simple Output
  5. Some Electronics
  6. Simple Input
  7. Advanced Input – Interrupts
  8. Pulse Width Modulation
       Extract:
    PWM And The Duty Cycle
  9. Controlling Motors And Servos
  10. Getting Started With The SPI Bus
  11. Using Analog Sensors
       Extract:
    Analog Input
  12. Using The I2C Bus
       Extract
    : I2C, HTU21D And Slow Reading 
  13. One-Wire Protocols
  14. The Serial Port
  15. Using WiFi
     Extract:
    WiFi 
  16. Sockets
     Extract:
    Client Sockets
     Extract:
    SSL Client Sockets
  17. Asyncio And Servers
     Extract:
    Asyncio ***NEW!
  18. Direct To The Hardware
     Extract:
    Using Hardware Registers 

<ASIN:187196282X>

If you want to go beyond a simple client you need to make use of a more general network connection method. The usual way of doing this is to make use of “sockets”. This is a widely supported internet standard and most servers support socket connections.

MicroPython supports a limited version of the full Python Sockets module. The parts of the module that are not supported are mostly those concerned with making connections using non-IP networks and hence are generally minor.

The most important thing to understand about sockets is that they are a very general way of making a two-way connection between a client and a server. A client can create a socket to transfer data between itself and a server and a server can use a socket to accept a connection from a client. The only difference between the two situations is that the server has to either poll or use interrupts to detect a new connection attempt.

Socket Objects

Before you can start to send and receive data you have to create a socket object:

import socket
s = socket.socket()

This default constructor creates a socket suitable for IPv4 connections.

If you want to specify the type of socket being created you have to use:

socket(af=AF_INET, type=SOCK_STREAM, proto=IPPROTO_TCP)

The af parameter gives the address family and it is either AF_INET for IPv4 or AF_INET6 for IPv6 – at the time of writing only IPv4 is supported. The type parameter indicates either SOCK_STREAM or SOCK_DGRAM, the stream option. The default, SOCK_STREAM, corresponds to the usual TCP/IP connection used to transfer web pages and files in general. It is a persisted and error-corrected connection whereas SOCK_DGRAM sends individual packets without error checking or confirmation that the data was received. The final parameter, proto, sets the exact type of protocol, but as the only two supported are IPPROTO_TCP and IPPROTO_UDP this is set according to the type parameter:

type

proto

SOCK_STREAM
IPPROTO_TCP
SOCK_DGRAM
IPPROTO_UDP


In a more general setting there could be more types of proto supported for each type.

Socket Addresses

After defining the type of connection, you need to specify the addresses involved in the connection. As sockets can be used to connect to a wide range of different types of network, the address format can vary a lot and not just be a simple URL or an IP address. For this reason sockets are used with their own internal address representation and you have to use the getaddrinfo method:

socket.getaddrinfo(host, port, af=0, type=0, 
proto=0, flags=0)

The first two parameters are familiar and simple. The host has to be specified using a URL or an IP address. The second is the numeric port to use with the socket. The next three parameters are the same as used in creating the socket. In general you use the same parameter values for an address intended to be used with a socket as used to create the socket. If you don’t specify a parameter than getaddrinfo will return a list of tuples for each possible address type. Each tuple has the following format:

(af, type, proto, canonname, sockaddr)

where af, type and proto are as before and canonname is the canonical name for the address type and sockaddr is the actual address, which may also be a tuple. In the case of an IP address, the sockaddr is a tuple with the format:

(IP, port)

At the time of writing ESP32 only supports IPv4 and it only returns a list with a single tuple. The only really useful part of this tuple is the final element which is an IP tuple used by most of the socket methods. You could short circuit everything by simply creating the IP tuple and not use getaddrinfo. However, you should use getaddrinfo to allow for compatibility with the full sockets module and for future development.

For example:

ai = socket.getaddrinfo("www.example.com", 
                   80,socket.AF_INET,socket.SOCK_DGRAM)

returns the list:

[(2, 1, 0, '', ('93.184.216.34', 80))]

and is it the final tuple:

('93.184.216.34', 80)

which we actually use in calls to socket methods. To extract this final tuple we use:

addr = ai[0][-1]

While on the subject of addresses, there are two functions which can be used to convert an IP address in “dotted” form to a byte value and vice versa:

socket.inet_ntop(socket.AF_INET,bytes)

gives the dotted text form and:

socket.inet_pton(socket.AF_INET,string)

gives the binary form of the IP address.


Last Updated ( Tuesday, 12 September 2023 )