| Remote Desktop To A Headless Pi Running Bullseye |
| Written by Harry Fairhead | |||
| Monday, 29 August 2022 | |||
|
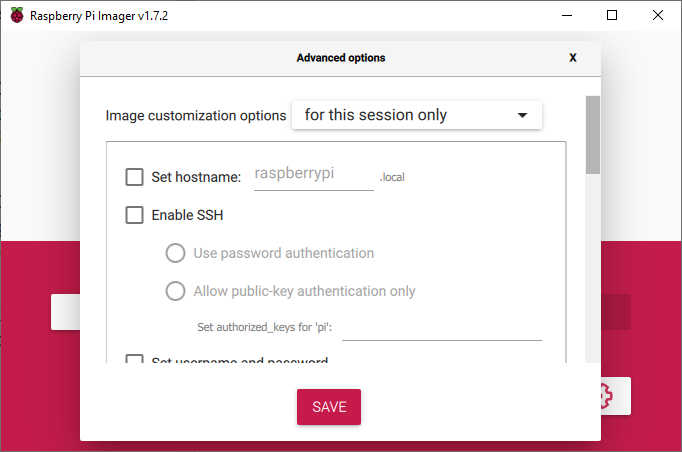
Connecting to a Raspberry Pi using Windows Remote Desktop is really useful, but the latest Pi OS (Bullseye) has made it slightly more difficult than before. Find out how to fix it. Headless, i.e. without a monitor, connection to a Raspberry Pi is really useful. You can take a desktop system and use it to work with any number of Pis. If you use a Windows desktop then, in principle, it is easy to use Remote Desktop Protocol - RDP to connect. There is a very good Linux RDP server that makes use of the X Windows system and a standard RDP client available on every Windows system. The RDP Linux client is open source and free to use. In many cases this makes it preferable to the alternatives - VNC in particular. One problem is that the latest version of Pi OS, Bullseye, has tightened security so that the existing instructions, which largely relate to the previous version of Pi OS, on how to get RDP working fail with what looks like a black screen. Fortunately the fix is easy - once you know what is going on. It is assumed that you have the remote desktop client on your PC and know how to use it and you know how to use Pi OS. Headless Pi OSThe easiest way to get a headless Pi OS is to use the imager. Download it from the Pi website and use it. Select the OS and the Target and then use Advanced Options to set a host name, enable SSH with a password and configure a WiFi connection:
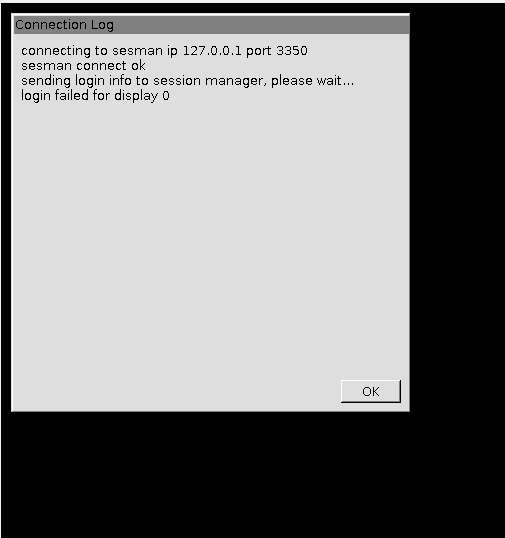
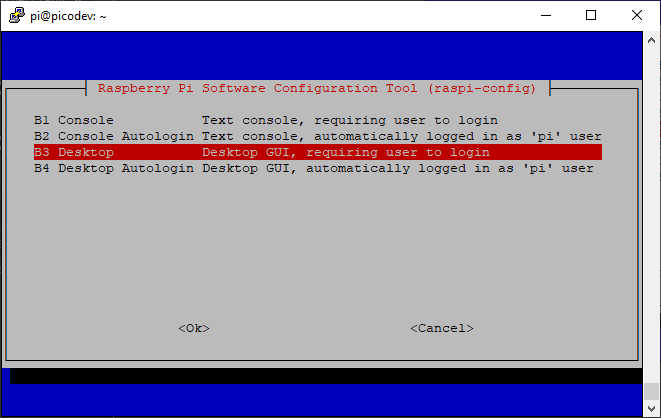
If you boot the Pi using the SD created you will be able to SSH directly in using the WiFi connection with the set user name and password. The user that you set up is the primary user and is a member of a large number of user groups - more than any additional user you might set up. Notice that your SSH connection doesn't need the Pi to have a monitor, keyboard or mouse. Install RDPAt this point you can use the SSH connection to install the RDP software. Getting the RDP server installed couldn't be easier. First make sure that everything is up to date: sudo apt-get update sudo apt-get upgrade Then install the xrdp server: sudo apt-get install xrdp When this finishes it is a good idea to reboot. Black ScreenThe RDP sever is automatically enabled and you can try to connect to the Pi using a remote desktop client on a PC. If you are using the latest Pi OS this is unlikely to work if you try to log in using the primary user pi. You will generally see a black screen but if you wait long enough you will eventually see: This is a very common message when anything to do with the RDP connection goes wrong. It goes without saying that if for any reason the remote desktop connection works at this stage don't bother with the following steps. This is all you had to do to make RDP work on the previous version of Pi OS. RDP UserAssuming you do encounter a black screen, the problem is two-fold. The first part of the problem is that the latest OS only allows one desktop session per user. A given user can have multiple console or SSH connections, but only a single desktop graphical connection. The second part is that the primary user is no longer allowed to RDP - see later. The simplest solution is to create a special RDP user: sudo adduser rdpuser you can use whatever name you like and set any password. Now you can make a remote desktop connection - as long as you log in with the rdpuser name and its password. You will still have to provide a log in for the primary user, pi, however. If you want to avoid this add the rdpuser to the sudo group: sudo usermod -a -G sudo rdpuser This is probably a good idea if you are doing development as it is useful to run as root sometimes. With this change you can provide rdpuser's password for the final stage of log in. Allowing the Primary User To RDPIf you want to allow the primary user, usually pi, to use remote desktop then you have two things to do. The first is you have to stop the auto-login when the Pi boots. If you don't you will already have a Desktop running when you try to connect using RDP and this will cause the connection to fail. To stop auto-login use: sudo raspi-config at the SSH prompt. Select System Options and then Boot/Autologin. Select either of the two "requiring user to login" options.
After this you will have to reboot, but this doesn't solve the second problem which is that the primary user is a member of two user groups that are excluded from connecting via RDP. If you try to connect at this point you will see the same black screen and then the error message you saw before. To allow the primary user to connect via RDP you need to remove the account from two groups. The video group has permission to use any video devices such as cameras and it is thought that allowing an RDP connection to access these isn't a good idea. Similarly, the render group allows the user access to video hardware - why would an RDP connection need this unless it was up to no good? The solution is to remove the primary user from both groups: sudo gpasswd -d pi video sudo gpasswd -d pi render You can always add the primary user back to the groups if the need arises: sudo usermod -a -G video pi sudo usermod -a -G render pi With the primary user removed from the two groups they should be able to connect via a remote desktop after a reboot. sudo reboot
More InformationRelated Articles64-bit Raspberry Pi OS Out Of Beta Raspberry Pi Chip Shortages Cause Price Hike Applying C - Sockets The Client
To be informed about new articles on I Programmer, sign up for our weekly newsletter, subscribe to the RSS feed and follow us on Twitter, Facebook or Linkedin.
Comments
or email your comment to: comments@i-programmer.info
|
|||
| Last Updated ( Tuesday, 30 August 2022 ) |


