|
Page 1 of 3 Linux drivers make working with devices so easy - assuming you know how. Here's how to get a Raspberry Pi to get data from the widely-used DHT22 Temperature Humidity Sensor.
This content comes from our newly published book:
Raspberry Pi IoT In PythonUsing Linux Drivers
Second Edition
By Harry Fairhead & Mike James

Buy from Amazon.
Contents
- Choosing A Pi For IoT
- Getting Started With Python
- Drivers: A First Program
- The GPIO Character Driver
- GPIO Using Ioct ***NEW!!
-
GPIO Events
-
-
Some Electronics
-
Pulse Width Modulation Extract: PWM *
-
SPI Devices
-
I2C Basics Extract: I2C *
-
The I2C Linux Driver
-
Advanced I2C
-
Sensor Drivers
-
-
Going Further With Drivers
-
Appendix I
*From the first edition waiting for update.
Up to this point we have been using drivers that are installed and configured. In most cases you will at least need to configure the driver or some aspect of the system. The Device Tree is the modern way to install and configure drivers and is the subject of this chapter. This is an introduction to the device tree from the point of view of someone wanting to use ready made drivers and ready made driver configurations with minimal customization. Most introductions to the device tree go into much more detail and are often written from the point of view of the device driver writer. This one is about understanding enough about the device tree to use supplied overlays. Chapter 16 picks up this subject again and extends it so that you can write your own overlays.
In Chapter but not in this extract
- The Device Tree and Overlays
- Working With Overlays
- Finding Out About The DT
The DHT22 Temperature Humidity Sensor – A Driver Example
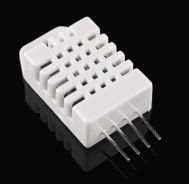
As an example of the stages you have to go though in using a driver targeting a single device, we can do no better than the DHT22 Humidity/Temperature sensor, a more accurate version of the DHT11. It is very easy to use, low in cost and hence very popular. It makes use of a custom protocol which means you can’t interface it using I2C or the SPI bus – you need something that will work with just it.
The good news is that there is a driver that is easy to use and, while targeted at the DHT11, works well with both versions and also with the AM2302, which is equivalent to the DHT22.
Model AM2302/DHT22
Power supply 3.3-5.5V DC
Output signal digital signal via 1‑wire bus
Sensing element Polymer humidity capacitor
Operating range
  humidity 0-100%RH;
  temperature -40~80Celsius
Accuracy
  humidity +-2%RH(Max +-5%RH);
  temperature +-0.5Celsius
Resolution or sensitivity
  humidity 0.1%RH;
  temperature 0.1Celsius
Repeatability
  humidity +-1%RH;
  temperature +-0.2Celsius
The device will work at 3.3V and it makes use of a 1‑wire open collector-style bus, which makes it very easy to make the physical connection to the Pi.
The 1-Wire bus used isn't standard, being used only by this family of devices, so we have little choice but to implement the protocol in C - or use a driver.
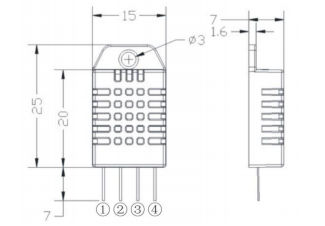
The pinouts are:
-
VDD
-
SDA serial data
-
not used
-
GND
and the standard way of connecting the device is:

Although the recommended pull-up resistor is 1K, a higher value works better with the Pi - typically 4.7K, but larger will work.
Exactly how you build the circuit is a matter of preference. The basic layout can be seen below.
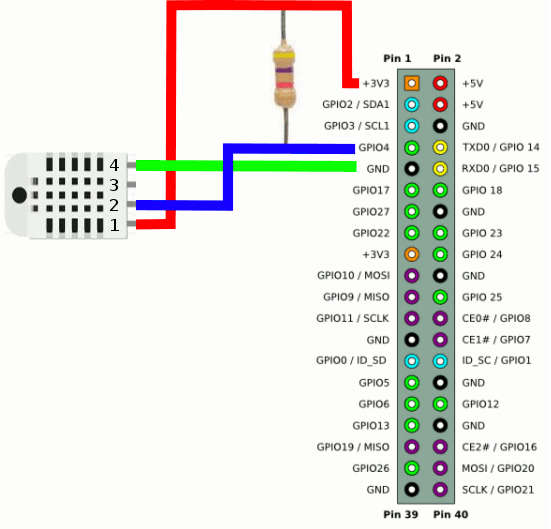
It is very easy to create this circuit using a prototyping board and some jumper wires. You can also put the resistor close to the DHT22 to make a sensor package connected to the Pi using three cables.
|
