| Pi IoT In C Using Linux Drivers -The DHT22 |
| Written by Harry Fairhead | ||||
| Monday, 15 February 2021 | ||||
Page 1 of 3 Linux drivers make working with devices so easy - assuming you know how. Here's how to get a Raspberry Pi to get data from the widely-used DHT22 Temperature Humidity Sensor. This content comes from my newly published book: Raspberry Pi IoT In C Using Linux DriversBy Harry FairheadBuy from Amazon. Contents
Up to this point we have been using drivers that are installed and configured. In most cases you will at least need to configure the driver or some aspect of the system. The Device Tree is the modern way to install and configure drivers and is the subject of this chapter. This is an introduction to the device tree from the point of view of someone wanting to use ready made drivers and ready made driver configurations with minimal customization. Most introductions to the device tree go into much more detail and are often written from the point of view of the device driver writer. This one is about understanding enough about the device tree to use supplied overlays. Chapter 16 picks up this subject again and extends it so that you can write your own overlays. In Chapter but not in this extract
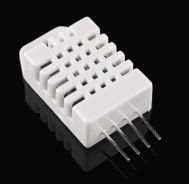
The DHT22 Temperature Humidity Sensor – A Driver ExampleAs an example of the stages you have to go though in using a driver targeting a single device, we can do no better than the DHT22 Humidity/Temperature sensor, a more accurate version of the DHT11. It is very easy to use, low in cost and hence very popular. It makes use of a custom protocol which means you can’t interface it using I2C or the SPI bus – you need something that will work with just it. The good news is that there is a driver that is easy to use and, while targeted at the DHT11, works well with both versions and also with the AM2302, which is equivalent to the DHT22.
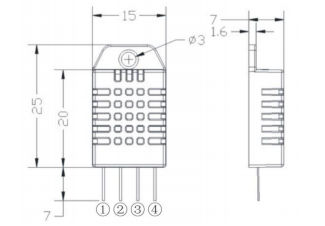
Model AM2302/DHT22 Power supply 3.3-5.5V DC The device will work at 3.3V and it makes use of a 1‑wire open collector-style bus, which makes it very easy to make the physical connection to the Pi.
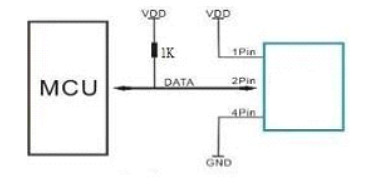
The standard way of connecting the device is:
Exactly how you build the circuit is a matter of preference. The basic layout can be seen below.
|
||||
| Last Updated ( Tuesday, 16 February 2021 ) |


