| Getting started with Gemini |
| Written by Alex Armstrong | |||
| Wednesday, 31 August 2011 | |||
Page 2 of 2
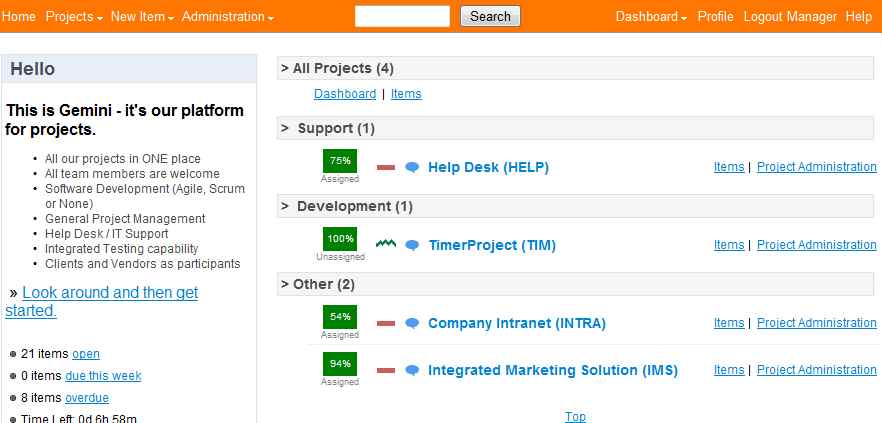
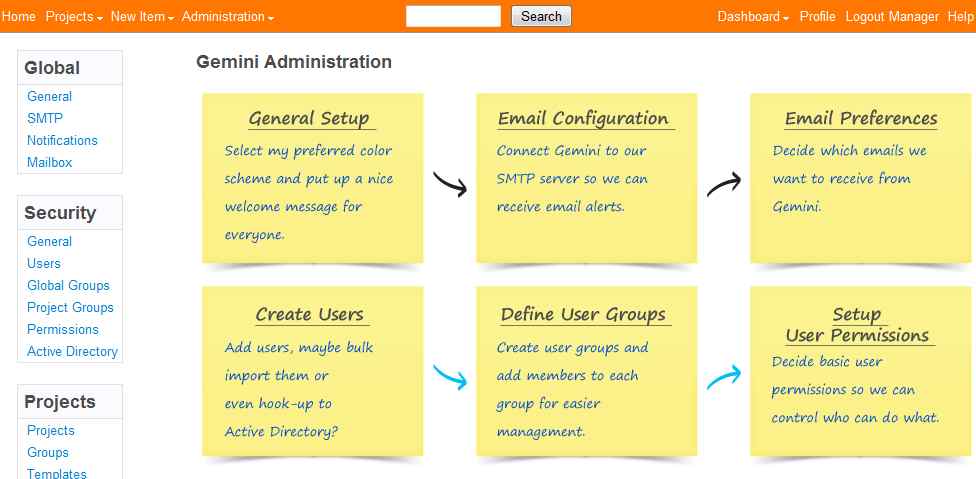
First lookNow that it is all setup and working you can log on as the administrator using the user name Manager and the password manager. From this point you can do just about everything you need to see up your bug tracking, issue management or project management site. You can create some users, user groups with custom permissions, create projects with custom fields and so on.
You can then set up a project of your own. This is deceptively easy. I say deceptively because at first look it seems to be just a matter of giving the project a name and then waiting for your users to post items to it. But once you start to dig a little you discover that there is a great deal that you can customize and add to without needing to move to Visual Studio and custom coding. Firstly you can create new item types complete with icon. For example when we first started to use the project the standard items were enough - we used Bug and New Feature mostly but then we realised that we needed to record new platform requests. The solution was to simply create a New Platform item. You also have to define a Type Group which specifies which projects the type will be available in.
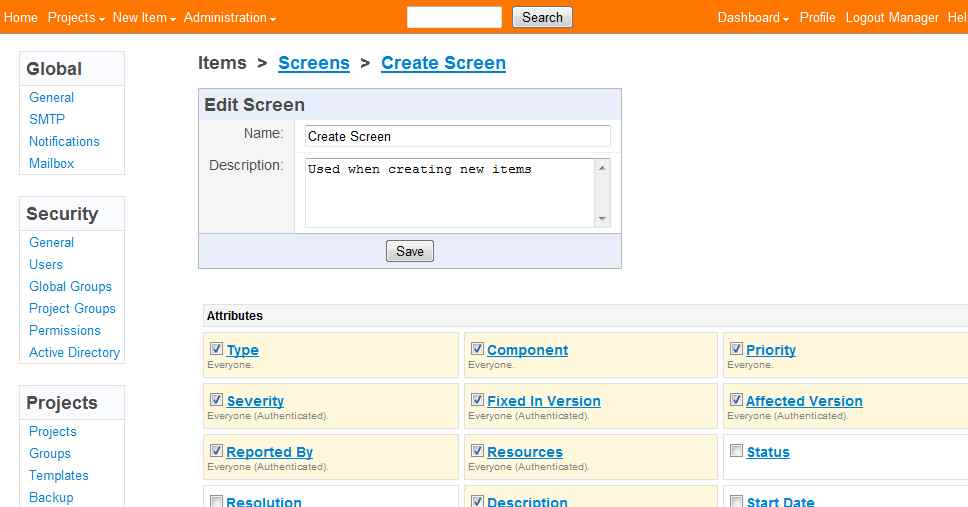
You can define custom types which allow you to add information into an item. Say you wanted to add a field that allowed the user to specify a monetary bonus for fixing the bug. You would first specify a new custom field called Bonus. If you want to you can supply max, min and default value and a regular expression to validate the entry. Next you have to specify where the custom field will appear by using or editing screens which are essentially data entry forms. For example to allow the bonus to be entered when the item is created you would edit the Create Screen to include it. You can also edit the screen to reduce the number of standard fields that are displayed.
You also need to specify components of the project that the items can apply to i.e. which part of the application the bug applies to. Think of components as a sort of sub-project structure and yes they can be nested to give a hierarchical structure. Then there is the matter of defining a workflow. All this means is defining states e.g. assigned/unassigned that can be applied to items and then define the transitions that are allowed. In this way an item can progress along a predefined workflow - or jump back to an earlier state in the workflow if that's what you have defined. You don't have to do any of this right at the start and you can develop your system as you go along and discover what exactly it is you need to implement. The point is that this is a very flexible system and the more you dig into it the more you discover you can do and some of the capabilities are quite surprising. For example, you can use the planner to organize items and the Gantt chart view provides a familiar task-oriented view of the items' start and stop times. Naturally there are also lots of different reports and filters to let you see exactly what you want to see and various types of email alert and watch facilities. It also manages testing but this is another whole area of application.
ExtensionThe point is that Gemini probably does nearly everything you could want out of the box as long as you spend the time customizing it - and you don't have to do this all in one go. Even the basic system is capable of expansion in different ways. For example you can add a source control system connector to Gemini and collate comments. The really good news is that there is a Visual Studio add-in which provides access to Gemini while you are working on the code of a project. This allows you to create and edit items and it has some nice features - like the ability to add a screen dump to an item. There is also a desktop application and a connector for Outlook. Just in case you suffer code withdrawal symptoms, the good news is that there is an API. This is either REST based or a .NET client. The REST API allows you to implement applications using any technology that has web access. The .NET client API uses the REST API but returns .NET object rather than XML or JSON. This makes it much quicker to create complex interactions. The API provides access to the admin, as well as the user, facilities of Gemini. This makes it possible to create applications that extend the use of the system via custom applications that create and/or process items. For example, you could create a mobile app that lets a remote user enter or update a specific type of item. Needless to say we have only scratched the surface of this Swiss Army Knife of software project management and it is sobering to discover how much customizability can be built into an ASP .NET application. It's worth checking it out as it can probably provide the project support infrastructure you need out of the box. To try it for yourself visit: Gemini http://www.geminiplatform.com/ As well as the free 3-user licence used here, there is also a free 30-day trial, with hosted and download options or you can book a demonstration. Gemini integrates with Atlas, the customer support website solution also from Countersoft. see Atlas - the easy way to keep the customer satisfied
|
|||
| Last Updated ( Wednesday, 31 August 2011 ) |