| Android Adventures - Activity And UI With Android Studio 2 |
| Written by Mike James | |||||
| Saturday, 23 July 2016 | |||||
Page 2 of 4
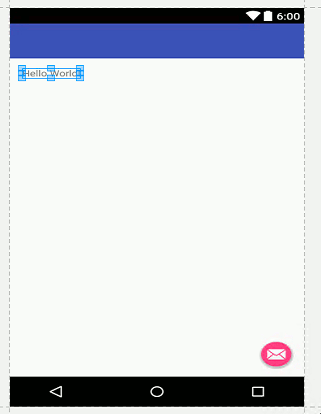
Creating A UITo see how all of this fits together lets add a button and a textView object. You probably already know that a button is for pressing and you can guess that a textView is used to show the user some text. First remove the Hello World text that is generated automatically when you create a new blank Activity. Load the content_main.xml file by opening it from the project view. The content_main.xml is where you create all of your UI. There is another layout file but as explained in chapter 1 this simply provides the standard elements in a UI like the AppBar. Notice that because of this split between two layout files you can see UI components in the designer that you cannot edit - they belong to the other layout file. To remove the "Hello World" all you have to do is select it and press the delete key:
Notice that there is an undo command if you delete something by mistake. Next select the button in the Widgets section of the Palette by clicking on it:
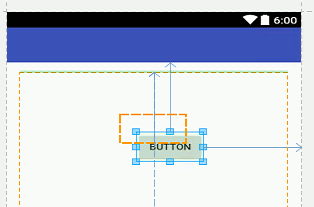
If you now move the cursor over to the design area you will discover that as you move various alignments are indicated by red lines:
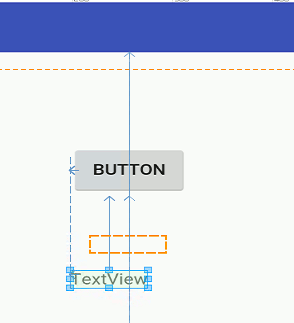
To place the button simply click and a full button complete with the default caption New Button will appear. Now you have a button on the UI ready to go let's add a Text Widget in exactly the same way - click on it in the Palette, position in the designer and click to set the position. Notice that Android Studio provides positioning information to help you align components of the UI.
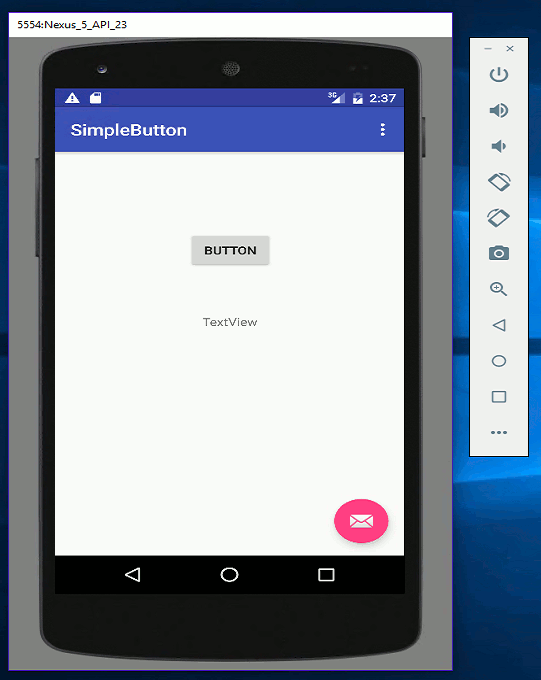
That's about it and yes creating a complete complex UI is just more of the same. Pick components from the Palette and position them on the design surface. If you now run the program, click on the green run icon and see chapter 1 if you don't know how to do this, you will see your new UI.
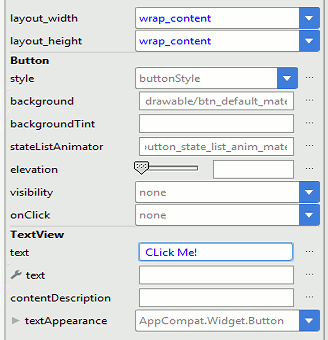
Of course it doesn't do anything even if you can click the button. The button does click but there is no code connected to the button click event to say what should happen - some thing we will deal with very soon. PropertiesOur next task is to change the caption on the button. You should know that objects have properties and methods. Things like caption text, background color and so on for UI widgets are represented as properties. You can change properties in code or at design time you can use the Properties window on the right-hand side of the screen. If you select the button and examine the properties window on the right you will find the button's text property. This currently contains the value "Button". If you change this to "Click Me!" and re-run the app you will see that the Button's caption has changed.
You can set the initial properties of any of the widgets that you have placed in the UI. There are a great many properties and we need to spend some time looking at some of them. However for the moment the important thing is that you see how easy it is to change a property using the Property window. As you might guess, the property that you changed results in a change in the XML file defining the layout. Recall that the general principle is that the designer creates the XML file that you could have created by hand without any help from the designer. In this sense, the designer doesn't add anything to the process other than being much easier. EventsNow we want to do something when the button is clicked. Android supports a complete event driven UI. So what we need to do next is define a method or function that is called when the button is clicked. If you are familiar with other languages you might find the Java way of working with events strange and convoluted. It is and we will have to come back to discover the full story of how events are implemented later. There are a number of different ways to specify an event handler but the simplest is to use the designer to generate the XML needed for the system to hookup the event handler to the event. This is not a method that you can use all of the time, it only works for the click event, but it gets you started. It is also worth point out if you have used something like Visual Studio that Android Studio doesn't automatically create event handlers for you. In the case of Android Studio you have to create a function and then assign it as the onClick handler. The reason for this apparently unhelpful approach is that Java events are much more involved than .NET or JavaScript events. Using the designer approach method click event handlers are simply public methods of the current Activity with the signature:
Just in case you have missed or forgotten what a function's signature is - it is simply the types of the parameters and the return type. In this case the function takes a single parameter which is a View and returns void i.e. nothing. You can call the method anything you like but in most cases it helps to specify exactly what the event it handles is. In this case we want to handle the button's onClick event - which occurs when the user clicks on the button with a mouse or more likely taps on the button using a touch sensitive device. Load the MainActivity.java file into the code editor and add the following method:
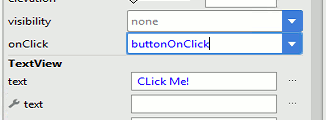
This needs to be added directly following the onCreate method or anywhere that makes it a method of the MainActivity class. With all this code out of the way if you now switch back to the designer and select the button. And find the onClick property in the Properties Window enter or select buttonOnClick:
Notice that you don't type in parameters just the name of the method. If you enter the click event handler before you try to set the property then you will find that it is in the drop-down list that appears when you click the down arrow on the right. That's all there is to it - define your event handler with the correct signature and set the appropriate onClick property in the properties window. When it comes to other types of event you have to do the job in code - the XML/Designer method only works for onClick.
|
|||||
| Last Updated ( Monday, 27 March 2017 ) |
