|
Page 1 of 2 Controls beyond the button? Here's a basic guide in Kotlin, an extract from my published book Android Programming in Kotlin: Starting With An App.
Android Programming In Kotlin
Starting with an App
Covers Android Studio 3 and Constraint Layout.
Is now available as a print book:

Buy from: Amazon
Contents
- Getting Started With Android Studio 3
- The Activity And The UI
Extract: Activity & UI
- Building The UI and a Calculator App
Extract: A First App
- Android Events
- Basic Controls
Extract Basic Controls
Extract More Controls ***NEW!
- Layout Containers
Extract Layouts - LinearLayout
- The ConstraintLayout
Extract Bias & Chains
- Programming The UI
Extract Programming the UI
Extract Layouts and Autonaming Components
- Menus & The Action Bar
- Menus, Context & Popup
- Resources
Extract Conditional Resources
- Beginning Bitmap Graphics
Extract Animation
- Staying Alive! Lifecycle & State
Extract State Managment
- Spinners
- Pickers
- ListView And Adapters
-
Android The Kotlin Way
If you are interested in creating custom template also see:
Custom Projects In Android Studio

In the chapter and/or the previous extract but not in this extract:
- Basic Input Controls
- Button Styles and Properties
- All Attributes
- Text Fields
- The onEditorAction Event
We continue with our look at basic controls with the checkbox and radio button.
CheckBoxes
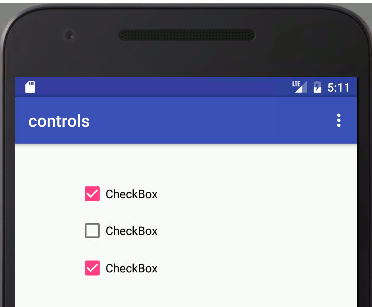
A CheckBox is a fairly obvious UI element. It displays a small label, controlled by the text property with or without a tick mark next to it. The user can select or deselect as many checkboxes as desired.
In most cases you don't bother to deal with the state of a CheckBox until the user presses some other control, usually a big button marked Done or similar. Then you can discover the state of each CheckBox by simply using the isChecked method which returns true or false:

For example, if you have a CheckBox with id checkBox then you can discover its state when a button somewhere on the view is clicked using:
var checked = checkBox.isChecked
Notice that you can use the isChecked method as if it was a Kotlin property as not only are get and set methods converted to a property, but also methods starting with is returning a boolean.
The CheckBox also supports the onClick event which can be used to process changes to its state, and you can set up the onClick event handler using the Attributes window as in the case of a Button.
So to handle the CheckBox change of state all you have to do is set its onClick event handler to:
checkBox.setOnClickListener { v -> checked = checkBox.isChecked }
Of course the event handler would typically do more than just store the state in a variable.
If you need to modify a CheckBox value then use the setChecked or the toggle methods.
|


