| Android Adventures - Fragments and Android Studio XML |
| Written by Mike James | ||||
| Thursday, 22 December 2016 | ||||
Page 2 of 3
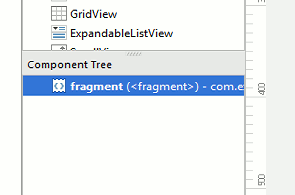
Using the DesignerYou can work with the Fragment using the Designer. If you switch to Design view you will see that the Component Tree shows a single UI component - fragment:
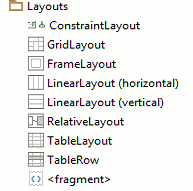
You can also work with the Fragment's properties in the Properties windows and here you can control many of the Fragment's aspects that you would normally write code for. We will return to this as we get deeper into how Fragments are displayed. You can also place your own Fragments onto the design surface using the fragments icon in the Layouts area of the Palette - more of how this works later.
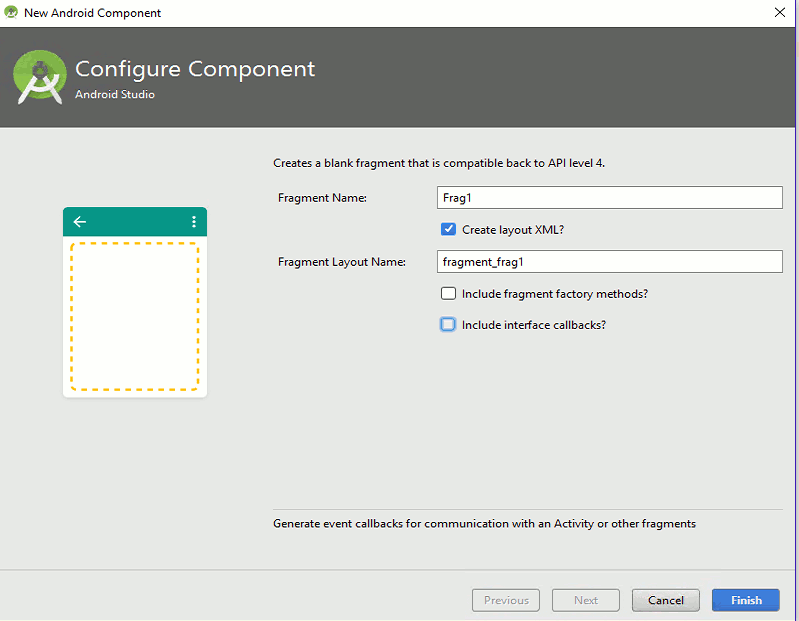
If you run the program you will see that the app has any UI you have defined in the fragment_main.xml. That is, if you are using this single Fragment app template at first you might think that this is nothing but adding complexity. Instead of simply defining your UI in a single XML file you now have three XML files, two doing more or less nothing and all of the work going on in the final one. You might have Fragments involved in you design but as far as you are concerned they don't exist because the XML covers all of the workings up - it all happens behind the scenes. So what is the point? The Fragment behaves like an independent component of your UI complete with its own layout and code. It is a modular chunk of UI, but this does no obvious good unless you have more than one modular chunk of UI to work with. If you don't you might as well unbundle the Fragment back into the Activity's UI and forget about it. You will only see an advantage in using a Fragment if you are using more than one of them. Two FragmentsEach Fragment is part of your UI and it is only when you start to use multiple Fragments do you start to see any pay back for the increased complexity involved in using a single fragment. So to see how things work we have to go beyond the simple template and at the moment Android Studio doesn't help with converting a the one Fragment template to a multi-Fragment project. The problem is that the template uses a FrameLayout as its base layout which is ok if you only have one Fragment but it isn't helpful if you want multiple Fragments in the same layout. The solution is to simply change the base layout and add more Fragments but it is easy enough to add Fragments to any project and it is worth knowing how to do it. So let's start over. We will start from a new Blank Activity that doesn't already have a Fragment added. This way we learn how to add additional Fragment to any existing project. We are going to add a simple Fragment complete with its Java class file and its XML layout file. A start a new Blank Activity project called TwoFragments and accept all the defaults. Do not select use a Fragment. Once the project is ready to work with right click on the Java folder containing MainActivity and select New, Fragment, Fragment(Blank). In the dialog box that appears name the Fragment Frag1 and deselect Include fragment factory methods and include interface callbacks. These two options are useful and in the future you will nearly always make use of them but for the moment leaving them turned off produces much simpler code. You should leave the Create layout XML option checked. A Fragment nearly always has two parts the java file that defines its behaviour and the XML file that determines its UI. It isn't often that a Fragment creates its UI purely from code.
When the new Fragment has been generated you will find two new files Frag1.java and fragment_frag1.xml. The Frag1.java file is very simple as you might expect. It contains the parameterless constructor that every Fragment has to have and a very simple implementation of onCreateView:
This simply inflates the XML layout file and returns the View as its result. If you move to the layout you will also find that it uses a Frame layout which isn't particularly useful as generally it can only hold a single View component. There is no easy way to change the layout used in the Designer as any attempt to delete it is ignored and the only thing you can change it to is a Constraint layout which for a Fragment is probably something you don't want to do. The simplest way to change the base layout is to edit the XML and the easiest way is to simply change the tag starting:
to
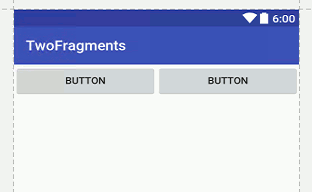
and then switch back to the designer to sort out the resulting mess of properties. Also make sure that the closing tag is changed to LinearLayout. If you are lazy, and all good programmers are lazy, this approach to making a change to the tag name and letting the Designer assign a coherent set of properties to the result is a good trick. Once back in the Designer, select Horizontal for the orientation property, remove the default text and drop two buttons on the surface just to make the Fragment distinctive.
To add this to the main layout we can switch to editing content_main.xml. This has a Relative layout by default and we might as well work with this for simplicity. To add the Fragment all you have to do is select the fragment icon in the Layouts section of the palette and drop it onto the design surface which causes a dialog box to appear:
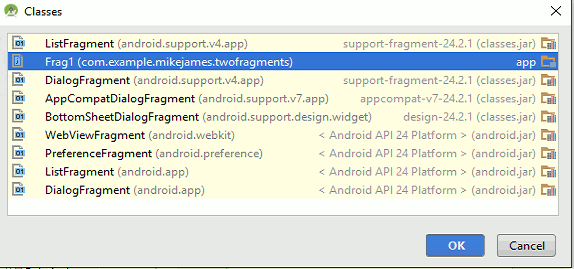
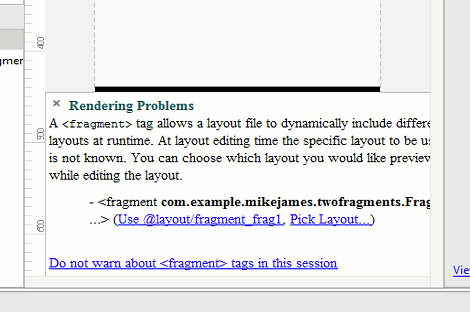
There are generally two files associated with a Fragment - the class file that implements it and the layout file that specifies the UI. At the very least you have to specify a class file, and this is what the dialog box is asking you to do. In this case we simply select Frag1. As soon as you do this the Fragment is positioned and an error message appears:
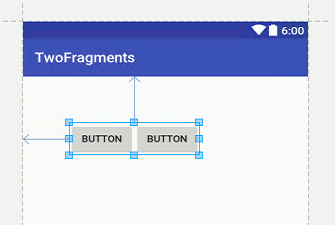
This really isn't an error because what it is doing is allowing you to specify the XML file to be used as a layout. You can either accept the suggestion of fragment_frag1 or you can click Pick Layout and choose something that the system doesn't find obvious. If you do this you will see the UI defined by the Fragment appear in the layout.
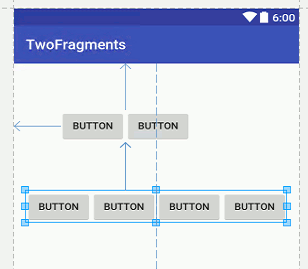
The idea is that there are two fundamental files that you have to associate with the fragment tag - the Java class file and the XML. The Java file is presented to you as a dialog box and the XML file as an error. Presumably at some point in the development of Android Studio a more coherent and polished approach to assigning the files to the tag will be implemented. As you can see in the screen dump you can position the Fragment as if it was any other UI component. There is a sense in which a Fragment is a custom UI component and this isn't a bad way to think about it. Now we can move on to add the second Fragment. All we have to do is repeat the steps: First use right click on the Java folder containing MainActivity and select New, Fragment, Fragment(Blank). In the dialog box that appears name the Fragment Frag2 and deselect Include fragment factory methods and include interface callbacks leave the Create layout XML option checked. Edit fragment_frag1.xml and change the tag FrameLayout to LinearLayout. Move back to the Designer and place four buttons ins the LinearLayout and set it to Horizontal. switch to editing content_main.xm and place a fragment on the surface. This time define the class to be Frag2 and select the fragment_frag2.xml file for the display. You will now find that you can position the four button Fragment just as easily as the previous Fragment.
If you run this app you will see the layout as shown in the content_main.xml file. You can use Frag1 and Frag2 as components in other layouts and modify the layout according to screen size and orientation - more of this later. Although we need to go into this a little more in the next chapter it is worth mentioning that if you use a fragment tag within another layout you can't remove or otherwise modify the Fragment displayed. You can modify the UI that that the Fragment generates but not the Fragment itself. You can see that if you simply allow Android Studio to do most of the work Fragments, at this simple level at least, are very easy to use and behave a lot like custom UI components. <ASIN:187196251X> |
||||
| Last Updated ( Sunday, 26 March 2017 ) |
