| Graphics and Animation in Visual Basic |
| Written by Mike James | ||||
Page 2 of 3
Step Five - Loading picturesThe second way of animating something is to change the graphic being displayed in the PictureBox. By showing images that show something in slightly different positions then you can create the illusion of movement. You might think that this was just a matter of setting the Image property to the correct file but a graphics file has to be loaded into memory before it can be displayed. When you set the Image property Visual Basic actually does quite a lot of work behind the scenes. The point is that what you specify as the image is a string of characters that gives the location of the file. The Visual Basic system finds the file and loads it into the machine's memory ready to display in the PictureBox. When you set the PictureBox's Image property in code you have to do this job for yourself. The key idea here is that an image is loaded into memory as an Image object. This is just like all of the objects you have met so far and comes complete with properties and methods that you can make use of. The big difference is that this object only exists in code. You can't see it on the form and it isn't in the Toolbox. It is an object without a visible component. Every VB program has a standard Image object that you can use to load a file. Later you will discover that there are ways to create additional Image objects. The built in or "static" Image object has a method called FromFile that will load a graphics file and create an new Image object. So for example to load a file as an Image into a PictureBox you would use: PictureBox1.Image=Image.FromFile("filename")
where, of course, you would replace filename by the name of the graphics file. For example, if there are two buttons on a form called Button1 and Button2 and an PictureBox control called PictureBox1 then you can make a light go on and off by defining the click routines as: Private Sub Button1_Click(
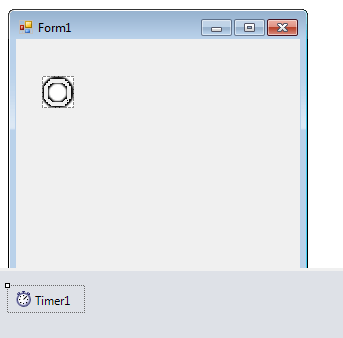
To set an Image or Picture Box to a blank simply specify: PictureBox1.Image=nothing Step Six - The Timer ObjectNow that you have met an object that doesn't make any sort of appearance on the Form it is time to meet an object that appears on the Form when you are designing it but not when you run the program - i.e. the Timer control. A Timer simply generates events at regular intervals and the idea is that it is easy to put a Timer on a form and customise it using the Properties Window but when the program runs nothing needs to be seen - the timer just ticks. Although the Timer object has lots of different uses you really can't mention the idea of animation without it. When you place a Timer on a form you don't see anything when you run the program - it is an entirely invisible control. What it does is to create events at regular intervals. These events are handled by the Timer's Tick event handler - this is the only event that a Timer responds to. In other words, you can use a Timer object to ensure that something happens at a regular interval. Not surprisingly this interval can be set via the Interval property. Less obviously, the interval is specified in milliseconds - and one millisecond is one thousandth of a second, i.e. 1000 milliseconds equal one second. You can also switch a Timer on and off using its Enabled property . When this is true the Timer causes events at the specified interval and when it is false the Timer does not operate.
When you first encounter the idea of a timer it seems like the answer to nearly everything you want to do and this does result in a tendency to use lots of Timer objects.If you have a lot of different things to do at different times then the beginner tends to create a timer for each interval. The result is generally a mess that is difficult to understand and hence debug or modify. A much better method is to use only one Timer object and set it to "tick" at the smallest time interval you want to use. Then create a "tick" handler which counts the ticks to work out what to do at any given time. For example, to show one image at one second and another at two seconds and so on you might use a Timer. Place a Timer on the form and set its Interval to 1000, and Enabled to True. The event handler (which you can create automatically by double clicking on the Timer) is something like: Private Sub Timer1_Tick( There are various things in this example that are subtle but you should be able to follow the general idea. There are also some technical things. For example the variable count has to be defined as Static so that it keeps its value between ticks. The statement count=(count+1) Mod 2 count the ticks but using modulo 2 i.e. it counts 0, 1, 0, 1, 0,1 and so on. (In general counting Mod N goes 0,1,2,...N-1, 0, 1,2 .. and so on i.e. count up to one less than N and then start at 0 again.) Using this the IF statement tests to see which picture should be loads. The result is an animation of something flashing. <ASIN:0538468459 > <ASIN:0470502215 > |