| The bitmap transform classes |
| Written by Administrator | ||||
| Monday, 22 March 2010 | ||||
Page 1 of 3 WPF bitmaps are immutable but that doesn't mean you can't transform them. Find out about rotation, scaling, changing pixel formatting and how to mangage color profiles.

The majority of the WPF bitmap classes implement immutable bitmaps - once loaded you can't change them. This is an efficient implementation when bitmaps are being used in static roles - as textures or backgrounds - but there are times when the bitmap as loaded isn't quite right for the job. You can always use WriteableBitmap which gives you the ability to make changes at the pixel level but there are also some classes specially provided to allow you to perform bulk edits such as cropping, rotating and color space changes. All of the transformation bitmap objects work in more or less the same way and they are all immutable. What this means is that the transformation objects take a bitmap object and recreate a new transformed version rather than modifying the existing object. CroppedBitmapFor example the CroppedBitmap object will apply a cropping rectangle to an existing bitmap and create a new bitmap consisting of only those pixels within the cropping rectangle. There are two ways of creating a CroppedBitmap object. The first is to create an object and then set its values. If you do this you have to use the BeginInit and EndInit method calls so that the system knows when you have finished changing the bitmap. After the EndInit you cannot make any more changes and the bitmap is immutable. If you forget to use the BeginInit or EndInit calls then no error message will be generated but neither will the bitmap - any display using it will display as blank. For example, we first load a bitmap into a BitmapImage - any object that derives from BitmapSource will do: Uri uri = new Uri( Next we create a CroppedBitmap object: CroppedBitmap cbm = new CroppedBitmap(); and start to set its properties: cbm.BeginInit(); The source property sets the input bitmap and the SourceRectangle determines the area read in from the source to create the CroppedBitmap. To complete the task we use the EndInit method and display the result in an Image control: cbm.EndInit(); The alternative way of doing the job is to simply use the constructor to specify the Source and SourceRectangle: Uri uri = new Uri( If you do it this way you don't have to use the BeginInit and EndInit as the constructor automatically does this for you and the resulting CroppedBitmap object is locked.
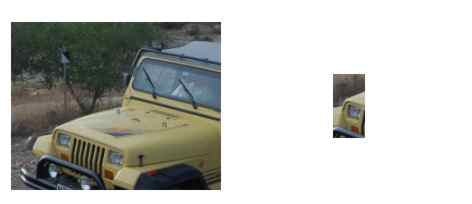
Original and cropped Clipping v CroppingThis brings us to an interesting topic - Clipping versus Cropping. When you crop a bitmap image you create a completely new bitmap based on just the pixels selected. Alternatively you can make use of the graphics systems clipping properties. This doesn't modify the bitmap in any way it just selects the area that is visible within the display. For example, the image control has a clip property which can be set to any shape by assigning it a geometric path. In the case of clipping to a rectangular area this is simply: image1.Source = bmi; Notice however that this doesn't quite do the same thing as the previous cropping example even though the rectangles seem to be the same. In the first example the rectangle was specified in pixels and when the bitmap loads into the image control it can be automatically stretched to fill the entire display area. In the case of the clip the rectangle is in terms of the display co-ordinates and specifies the area of the image control that will display. If you really do need a cropped bitmap and you plan to use it in multiple locations then use the CroppedBitmap approach. If however you only want to display part of an image use the clipping approach.
|
||||
| Last Updated ( Monday, 22 March 2010 ) |