| Getting started with Windows Phone 7 |
| Written by Harry Fairhead | ||||
| Friday, 20 August 2010 | ||||
Page 1 of 3 Developing applications for Windows Phone7 is easy and we show how to get started with hardly any effort and construct the "iconic" WP Phone Home application on the way.
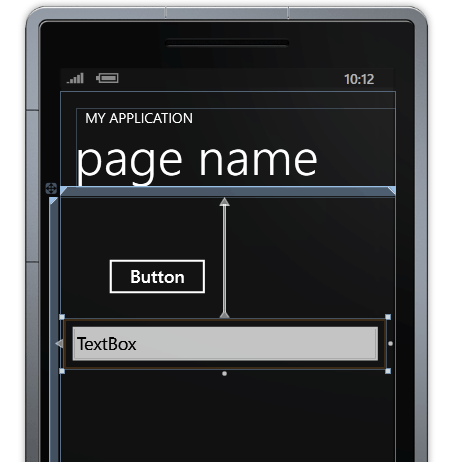
Getting started with Windows Phone 7 (WP 7) development is very easy - as long as you know C# and either WPF and/or Silverlight. Even if you just know how to program in C# it's not too difficult because the development method follows the general pattern of any Windows development. So let's build a program and see how it all works. First you have to download the development tools. When you install this you will either get the standalone Express version of WP7 or the environment will be added onto any existing Visual Studio 2010 you might have installed. In addition a copy of Expression Blend and XNA studio - both customised to work with WP7 applications - are installed. Expression Blend is what you need to create "designer" style user interfaces, complete with animation and other graphics effects. XNA is what you need if you want to create 2D/3D action games. If you just want to create a functional application, complete with a "normal" user interface, then you need to create a Silverlight project which is the subject of this article. If you want to know about XNA and expression blend lookout for future articles. Hello Phone 7Once you have downloaded and installed the tools start either Visual Studio or the Express version running and select File, New Project and Select Windows Phone Application from the New Project dialog box. The next screen that you see will include a view of the user interface and the XAML that creates it in the drag-and-drop editor. To build your first "Hello World" application simply open the Toolbox and drop a Button and a TextBox on the page.
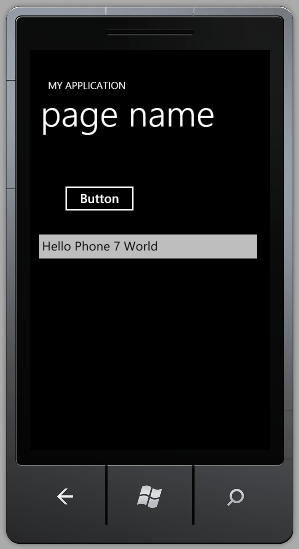
Next double click on the button and you will be taken to a code editor with a click event handler for the button already defined. If you enter into the body of the event handler the single line: textBox1.Text = "Hello Phone 7 World"; then you have completed your first application. Click the green "run" button in the toolbar or press F5 and the Windows Phone 7 emulator will appear and eventually, it can be slow to load, your application will run. If you click on the button you will see the message appear in the textbox. When you have finished running your program there is no need to stop the emulator - it will be reused the next time you run a program and you will save the time it takes to load.
At this point you should also discover how the emulator's control bar works. If you hover the cursor at the top right-hand corner you will see a vertical toolbar appear. Using this you can zoom the emulator window and rotate it to simulate using the phone in different orientations.
It is also worth setting break point on the single line in he event handler and running the program again to discover that the usual Visual Studio debugging facilities work.
WP 7 features - Multi-touchAfter writing such a simple program, if you know Silverlight or WPF then you should be fairly happy with getting started on your own real application. It's just a matter of finding out which controls are supported and investigating the additional classes supplied to make use of the hardware and other services. However there are two immediate features of WP 7 that make any Silverlight/WPF programmer wonder how to proceed - Multi-touch and rotation. Multi-touch refers to the new way of manipulating on-screen objects that has become so popular with the introduction of the iPhone. The idea is that instead of just having one click or drag location you can have multiple locations. So for example placing two fingers on the screen and then moving them apart can be used to signal a re-sizing operation.
<ASIN:0735643350> <ASIN:1449388361> <ASIN:0470886595> <ASIN:1430233060> |
||||
| Last Updated ( Monday, 20 September 2010 ) |


