| Getting Started with PC Kinect |
| Written by Harry Fairhead | |||||||||||||||||||||||
| Monday, 31 January 2011 | |||||||||||||||||||||||
Page 1 of 2 Joining in the Kinect fun can be difficult because of the lack of clear instructions on how to get it all working. This article explains what each piece of the software package does and how to connect and use Kinect with a PC.
The most fun game on the block at the moment is the Kinect - no, not a game that uses the Kinect, the Microsoft Kinect itself. This is a full 3D scanner that can be used to digitise a scene and recognise elements within it. It's great fun to play with and there are lots of applications. The only problem is that as Microsoft never intended you to use the Kinect with the PC it can be difficult to find out how to do it.
In this article I'm going to explain the basics of getting started with the Kinect - up to running some basic demos. I'm also going to use the semi-official Kinect software that PrimeSense has made available. This is semi-official as PrimeSense is the company that created the basic hardware that Microsoft used to create the Kinect sensor. If you want to know how Kinect works then see: All About Kinect. PrimeSense has made available a set of drivers, and API and a "middleware" program called NITE which does things like skeletonization and other higher level processing. PrimeSense has made all this available as an open source project called OpenNI. The only problem is that the drivers that they supply are for their own reference hardware and not the Kinect. However changing the driver is a matter of modifying configuration files and this has been done for the Kinect and made available as a project "fork"(or subproject). So the basic outline of what we have to do is:
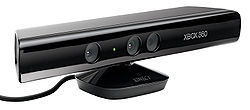
and have fun. Of course if you have bought the reference hardware kit from PrimeSense then everything just works with their drivers. So let's work our way thought connecting, installing and testing the basic Kinect/OpenNI PC setup. I'm going to describe the software side from the point of view of Windows 7/Vista but the principles apply to Linux and other versions of Windows. The hardwareIf you look at the plug on the end of the cable that come out of the Kinect you will realise that what you have looks like a USB connector but not quite. The connector used is a proprietary connector designed to allow the Kinect to be plugged into the new black XBOX 360 without the use of an external powersupply. Older XBOXes don't have the special connector and they come with an external power supply which has an adaptor to convert the Kinect plug into a standard USB connector and power supply connector. If you have bought a Kinect with a recent XBox as a bundle then you will need to buy the adaptor/power supply. At the moment these are only available from the Microsoft store. If you go to: http://store.microsoft.com/home.aspx then you should be able to select a local version of the store from the list if you are not in the US. To find the appropriate powersupply search on Kinect Sensor Power Supply. The unit costs less than $20 but be warned they seem to go out of stock very quickly. At the moment there are no 3rd party adaptors but this is likely to change. If you can't wait for the unit to be back in stock or if you want to make something custom then it is quite easy to work out the pin connections:
If you look at the end of the connector pin 1 is next to the beveled corner with pints 2 to 5 next to it and pin 6 below it. You can, of course, do the job by cutting the cable and wiring a 12V supply and a standard USB connector.
Software installation.Now we come to the most confusing part of getting started - installing the software. What you have to do is first to install the latest OpenNI build for the operating system you are using. At the time of writing the latest version can be found at: http://www.openni.org/downloadfiles/openni-binaries/20-latest-unstable Scroll down and you will see the OpenNI Unstable builds for Windows, Ubuntu and MacOSX. Download the one you need and install it. In the case of Windows the file is a standard Windows executable - currently called: OpenNI-Bin-Win32-v1.0.0.25.exe and you simply run this and accept the defaults. This installs the API and the drivers. Note: it turns out for reasons that aren't clear to be better to download i.e. Save the file and then Run it rather than selecting Run as the download option. Also you might well see security warnings about installing unsigned drivers - simply ignore them and carry on with the install. Of course as already explained earlier these drivers are for the PrimeSense reference hardware. If you are using this you can now plug it in and drivers should be automatically installed and you can skip the next step. Sensor Kinect driversIf you are using the Kinect hardware you need to install the modified drivers. These can be downloaded from https://github.com/avin2/SensorKinect You can download the source if you want but if you click the Downloads button you will be given a choice of a tar file or a zip file. Download the .ZIP file for a Windows installation as this is easier to unzip but both compressed files contain everything you need for a Windows, Ubuntu or MacOSX installation. At the time of writing the ZIP file is called: avin2-SensorKinect-0124bd2.zip When the zip is downloaded unzip it to a suitable directory and navigate to the Bin directory where you will find installation packages for each of the operating systems supported. In the case of Windows there is a standard Windows executable as the installer SensorKinect-Win32-5.0.0.exe - if you run this it will update the previous installation to work with the Kinect hardware. <ASIN:B002BSA298@COM> <ASIN:B0036DDW2G@UK> <ASIN:B0036DDW2G@FR> <ASIN:B002BSA298@CA> <ASIN:B003H4QT7Y@DE> <ASIN:B00499DBCW@IT> <ASIN:1849690669> |
|||||||||||||||||||||||
| Last Updated ( Saturday, 07 May 2011 ) |