|
Page 1 of 5 Android graphics is a huge subject, but you have to start somewhere. In this chapter we look a simple 2D bitmap graphics, which is often all you need, and find out what the basic principles of Android graphics are.

Starting With an App
Third Edition
Is now available in paperback and ebook.
Available from Amazon.
- Getting Started With Android Studio 3
- The Activity And The UI
- Building The UI and a Calculator App
- Android Events
Extract: Using Lambdas
- Basic Controls
- Layout Containers
- The ConstraintLayout
Extract: Guidelines and Barriers
- UI Graphics A Deep Dive
Extract: Programming the UI ***NEW
- Menus & The Action Bar
- Menus, Context & Popup
- Resources
- Beginning Bitmap Graphics
Extract: Simple Animation
- Staying Alive! Lifecycle & State
- Spinners
- Pickers
- ListView And Adapters
If you are interested in creating custom template also see:
Custom Projects In Android Studio

Graphics support in Android is extensive - from the simple display of images and 2D graphics through animation and on to full 3D rendering. To cover it all needs a separate book, and even then there would be topics left untouched.
This chapter is an introduction to the minimum you need to know about 2D bitmap graphics in Android. It isn't all you need to know to get the job done, but it is enough to get you started on many common simple graphics tasks. With this grounding you'll also be in a position to seek out some of the additional information you need to do the less common things.
The key difference between this account of Android graphics and the typical approach you find in other documents is that it concentrates on the principles as well as the how-to. By the end of this chapter you should have a clear idea of what the different Android graphics classes are all about.
The Bitmap
You could say that the bitmap is the foundation of any use of Android graphics. The reason is that no matter how a graphic is specified or created, it is a bitmap that is eventually created and displayed on the screen.
There are many ways of creating or obtaining a bitmap. We have already seen how a bitmap file, .jpg, gif or .png can be included in the drawable/ resource directory and displayed in an ImageView control. In many cases a bitmap can be acquired by loading a file, reading in a collection of bytes or even taking a photo with the Android camera.
In this instance we will simply create a Bitmap directly:
Bitmap b = Bitmap.createBitmap(100, 100,
                       Bitmap.Config.ARGB_8888);
A bitmap is simply a rectangle of pixels. Each pixel can be set to a given color but exactly what color depends on the type of the pixel. The first two parameters give the width and the height in pixels. The third parameter specifies the type of pixel you want to use. This is where things can get complicated. The specification ARGB_8888 means create a pixel with four channels ARGB - Alpha, Red, Green, Blue and allocate each 8 bits of storage. As four eights are 32 this is 32 bit graphics. The alpha channel lets you set an opacity.
There are many different pixel formats you can select and there is always a trade off between the resolution and the amount of space a bitmap occupies.
However ARGB_8888 is a very common choice.
Now you have a bitmap what can you do with it?
The answer is quite a lot!
Most of the methods of the Bitmap object are concerned with things that change the entire image. For example
b.eraseColor(Color.RED);
sets all of the pixels to the specified color, red in this case.
However using the setPixel and getPixel methods you can access any pixel you want to and perform almost any graphics operation you care to. You can also work with the pixel data at the bit level.
The ImageView Control
How can you see a Bitmap that you have just created?
The simples answer, though it isn't often given, is that you can use an ImageView control. The reason that it isn't often given as an option is that what you can do with an ImageView control isn't as wide ranging as other approaches - such as overriding the ondraw event handler. This said the ImageView Control is very easy to use and sufficient for many tasks.
Start a new blank project and place an ImageView into the UI, you can accept the defaults.
As a demonstration of how you can use the ImageView to display a Bitmap change the onCreate event handler to read:
@Override
protected void onCreate(Bundle savedInstanceState) {
 super.onCreate(savedInstanceState);
 setContentView(R.layout.activity_main);
 Bitmap b = Bitmap.createBitmap(500, 500,  Bitmap.Config.ARGB_8888);
 b.eraseColor(Color.RED);
ImageView imageview=(ImageView) findViewById(R.id.imageView);
 imageview.setImageBitmap(b);
}
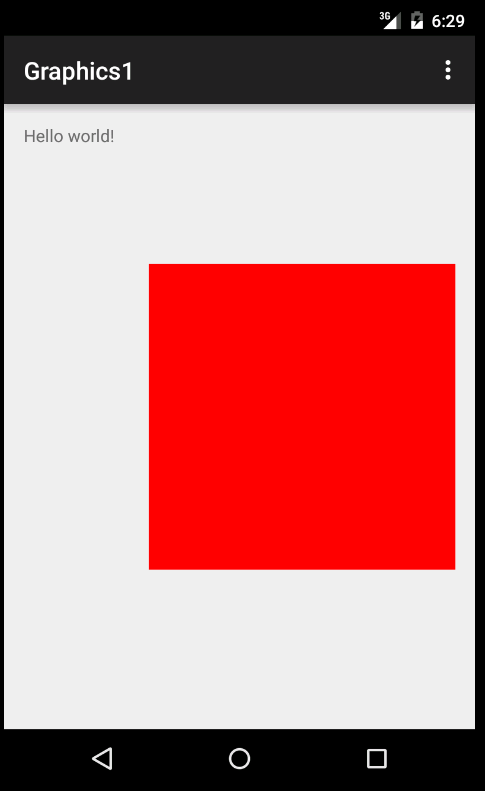
If you run the program you will see a fairly large red square appear where the ImageView control has been placed.

Notice the ImageView control has been automatically resized to show the Bitmap.
The ImageView control has a range of methods similar to setImageBitmap that makes it useful for displaying a range of different types of graphic.
Canvas
You can just use a Bitmap and work with individual pixels but this isn't a very "high level" way to create graphics. What we need are some larger scale methods that draw useful things like lines, rectangles, circles and so on.
The Bitmap object doesn't have this sort of method but the Canvas object does and you can use it to draw on any Bitmap.
That is you create a Canvas object, associate it with a Bitmap, and you can use the Canvas object's methods to draw on the Bitmap.
There are lots of different Canvas drawing methods and even a facility to transform the basic co-ordinate system to anything you care to use but we have to start somewhere so a simple example first.
You can create a Canvas and attach it to a bitmap in one operation:
Canvas c = new Canvas(b);
Now when you use the drawing methods of the Canvas it draw on the Bitmap b.
There are many cases when a control or object will present you with a Canvas object that it has created for you to let you draw on a Bitmap object that it owns.
It is also important to know that initially the co-ordinate system of the Canvas object is set to pixels as determined by the Bitmap. That is, if the Bitmap is width by height pixels, the default co-ordinate system runs from 0,0 at the top left-hand corner to width,height at the bottom right.
Using Canvas can be as simple as calling a method like drawLine to draw a line between two points. The only slight complication is that you have to use the Paint object to specify how the line will be drawn. In general Paint controls how any line or area is drawn by the Canvas methods.
A typical Paint object is something like:
Paint paint = new Paint();
paint.setAntiAlias(true);
paint.setStrokeWidth(6F);
paint.setColor(Color.BLUE);
paint.setStyle(Paint.Style.STROKE);
After creating the Paint object we set antialias on - this creates a higher quality but slightly slower rendering, and set the width of the line to 6 pixels, color to blue and set it as a stroke, i.e. a line rather than an area fill. If you are puzzled by the 6F in the setStrokeWidth it is worth saying that this is how you specify a float constant in Java.
Once created you can use a paint object as often as it is needed and you can modify it and reuse it. You can also use an existing Paint object to create a new Paint object which you then modify.
|


