| Insider's Guide To Udacity Android Developer Nanodegree |
| Written by Nikos Vaggalis | ||||
| Monday, 20 March 2017 | ||||
Page 1 of 3 The Android Developer Nanodegree, designed by Google and delivered through Udacity's platform, is for intermediate Java developers, or even those experienced in other object-oriented languages, looking to start developing for Android. As such it teaches the tools, principles, patterns and conventions pertaining to Android. UPDATE There's now a newer version of this program and some important features have changed. See See Udacity's Developing Android Apps with Kotlin, Udacity Withdraws Jobs Guarantee and The Benefits of A Udacity Nanodegree Also, for information on what it's like to undertake a Udacity Nanodegree Program see The Insider's Guide to the Java Web Developer Nanodegree. The Android Developer Nanodegree comes in two flavours, ordinary and Pro, the latter guaranteeing a job upon graduation or the 100% of the fees back. In both cases graduates are awarded the Nanodegree credential which as well as being considered a career-worthy asset also affirms the skills mastered in the course. Employment Guarantee?Even if it doesn't prove prestigious enough to secure a placement in the wider job market, Udacity has the mechanisms in place to guarantee a job opportunity, either with one of its partners, which comprise of companies such as Google, AT&T and Facebook, or through established career programs such as Blitz, which render Udacity as an employee supply agency that matches students to independent clients and startups. If there is no job available the fallback is the offer of a 100% money back guarantee. Other benefits in the Nanodegree are that students receive 1:1 feedback as well as personalized career support, get timely project and code reviews, and build a career worthy portfolio. To get beyond the hype and provide a first hand experience to readers of I Programmer, I enrolled on the Android Developer Nanodegree. As the syllabus is split into milestone projects that have to be completed linearly in order, I set to record my experience at the end of each milestone, starting with Stage 1 of the "Popular Movies" project as the first of this journal. Nanodegree OutlineBut before diving into the internals, we ought first to go through the structure of the course.First of all it deviates from the traditional educational institutions' standards in several ways.There are no semesters but only estimates on the course's duration, ranging from 6 to 12 months depending on the time and effort the scholar is willing to dedicate. There are no hard limits or deadlines per se - you are just required to meet each project's specifications.As such if you're quick or skilled enough, there's no stopping you submitting project after project without having to wait for anything or anyone. If that's the case, you might be able to save lots of money as each month gone by costs you $199 or $299 (in the Pro edition). Hence it's in your best interest to finish the degree as soon as possible. Finishing as early as possible isn't recommended for those who are wanting to gain a solid foundation on which to build a career. However if you did want to do it, it could be pretty easily achieved due to the large amount of completed projects and available course material circulating online by those still studying or having already graduated. Submitting your work can be either done through packing it and sending it as a ZIP file, or as a link to your public GitHub repository, the latter being highly encouraged by the Nanodegree personnel. Working in full public view, serves in building a career-worthy portfolio and in advancing your coding through sharing and examining other people's implementations.It also builds in safeguards,by making plagiarism easier to spot. Such cheating would be revealed on the verge of landing a job, since the lack in the advertised skills would be more than obvious.So take the course for the right reasons - that is to learn. Bear in mind that there's also no final exams in the traditional sense, as your skills are proven by your engagement with highly demanding projects. With that in mind, let's take a look at the syllabus before focusing on the nitty-gritty details: Project1: Popular Movies, Stage 1 Build an app to help users discover popular and recent movies. You will build a clean UI, sync to a server, and present information to the user. Project2: Popular Movies, Stage 2 Add onto your project from Stage 1.A detail view for each movie which allows users to ‘favorite’ movies. Project3: Stock Hawk! In this project, you will produce an app, taking it from a functional state to a production-ready state. To do this, you will find and handle error cases, add accessibility features, allow for localization, add widgets, and add a library. Project4: Build It Bigger Use Gradle to build a joke-telling app and factor functionality into libraries and flavors to keep the build simple. You’ll also configure a Google Cloud Endpoints development server to supply the jokes. Project5: Make Your App Material Implement Android design concepts and transform a functional newsreader app using material design techniques. Project6: Go Ubiquitous Let users access the weather at a glance by building a Sunshine watch face for Android Wear. Project7: Capstone, Stage 1 - Design, Scope and Plan Your App Create a detailed plan, including UI mocks and technical specifications, for building your own app. Project8: Capstone, Stage 2: Build and Polish Your App for Production This is your chance to take the skills that you’ve learned across your Nanodegree journey and apply it to an app idea of your own. Project Resume Review In this project, you will update your resume according to the conventions that recruiters expect and get tips on how to best represent yourself to pass the "6 second screen". You will also make sure that your resume is appropriately targeted for the job you’re applying for. We recommend all students update their resumes to show off their newly acquired skills regardless of whether you are looking for a new job. First StepsLet's now break down Stage 1 of the 'Popular Movies' project. With an estimate of 12.5 hours in effort required, this module comprises four lessons subdivided into several individual units:
First of all let's get something clear.The effort in time required as well as the given due dates are there for reference only and are based on the time it takes a typical student (someone who regularly dedicates 10 hours per week) to complete the program. As such their role is indicative and can be thought of as an attempt in keeping you in line and in motivation. There are no penalties for missing a deadline or dedicating more hours to a lesson - it's a truly self-paced program. The exercises are based on the reference project "Sunshine", a weather forecast application which you build step by step by transferring the gained know-how in the explored throughout the course of the program core Android APIs. There's also another code base you work on and fluctuate between Project "Sunshine".It's the "Favourite Toy" exercises, the main material upon which the core API concepts are tested.These concepts are then shifted and applied onto Project 'Sunshine's building, just like shaping blocks off site and transferring them to the main construction where you put block over block until the building's complete. After a few introductory videos, the learning experience begins with the instructor led pre-recorded videos going through the concept of Layouts and their availability on the platform. Mentioning the instructor, he's Google's Engineer Dan Galpin.As well as very experienced, he also speaks clearly and guides you throughout the course's lifetime with great confidence. He is not the lone star however, as a few other Google engineers step on the stage.
The next lesson on "Connecting on the Internet" goes through the topics of logging for debugging, building URLs, making HTTP requests as well as the permissions necessary for an app to be able to access the internet.That, together with a Layout containing a toolbar Menu, are combined in an exercise that requires developing an app which searches GitHub repositories by name. All coding is done in Android Studio and there's no particular requirement of a specific version.It should works with any. The Layout furthermore contains an Edit box that's going to store our search term, a Text box that's going to display the built URL, and yet another that's going to store the results of the call.We hook up the Menu resource which we inflate inside the Activity and use findViewById to get references to the UI elements. In building the URL we create a separate utility class, NetworkUtils, which calls into the Uri library : Uri builduri= .appendQueryParameter(PARAM_QUERY,githubSearchQuery) .appendQueryParameter(PARAM_SORT,sortBy).build();
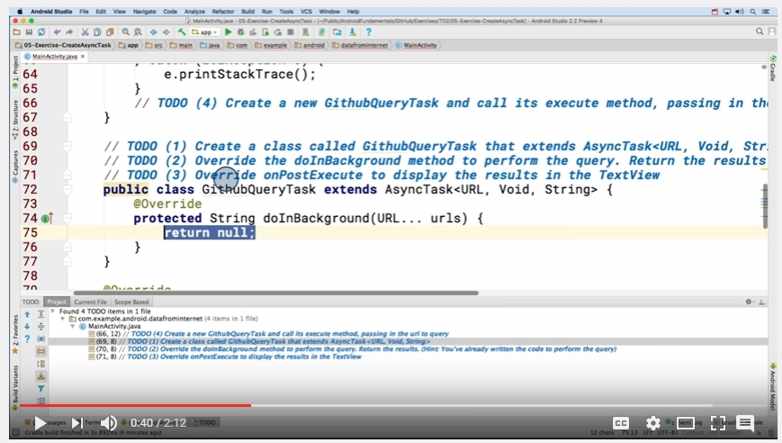
https://api.github.com/search/repositories?q=android&sort=stars Then we use HttpURLConnection to make the actual call and retrieve the results, on the way adding Exception handling and Logging. Before going any further we refactor our code so that all network activity is encapsulated within an AsyncTask, so that when the time consuming network call attempt takes place it does not freeze the main UI thread. At this point, I should explain the way the exercises are done. You are given the template of the exercise which is intermingled with boilerplate code and a number of TODO placeholders that you have to fill in for with your own code. For example in the exercise on AsyncTask:
// TODO (1) Create a class called GithubQueryTask that extends AsyncTask<URL, Void, String>
to perform the query. Return the results.
// TODO (3) Override onPostExecute to display the results in the TextView.
// TODO (4) Create a new GithubQueryTask and call its execute method, passing in the url to query.
The question though is, how do you tackle those TODO's? The answers lies in watching the short 1-3 minute long corresponding videos, in which the instructors go through the code required to replace those placeholders.Of course it's not easy to follow someone writing code in a video, so you have to pause and rewind many times to get the hang of it. Although doing the TODOs in conjunction with watching the videos can be thought of as a mere act of copying and pasting, it's a method that actually seems to work, as the moment that you replace the TODOs with your code, you start visualizing the bigger picture and the way things are flowing. |
||||
| Last Updated ( Thursday, 23 July 2020 ) |