| CodeStar to Simplify Development On AWS |
| Written by Nikos Vaggalis | |||
| Monday, 24 April 2017 | |||
|
For developers the most important announcement made at last week's AWS Summit was CodeStar, which is intended is to enable you to quickly develop, build, and deploy applications on AWS.
CodeStar is thus an attempt to fix the tedious process of setting up your development infrastructure on the AWS platform, which we uncovered in the AWS for the Impatient series of articles "The problem with entering the AWS world for the first time is that it's like entering a labyrinth, a futile attempt of navigating through an endless maze of documentation, policies, endpoints, services, tokens and authentications. The task of having to hook all that up in order to get on with your job is daunting." To alleviate this situation, Codestar provides a set of preconfigured project templates and by taking care of all the necessary permissions, where AWS is particularly picky, "so you don't need to create or manage complex IAM policies". It goes even further in attempting to provide a good round development suite where team members can push code, deploy changes and track issues, incorporate continuous integration and delivery, and monitor all project activity, such as recent code commits, tracking the status of code changes and building results and deployments, all through a single dashboard. In detail the key benefits of AWS CodeStar are:
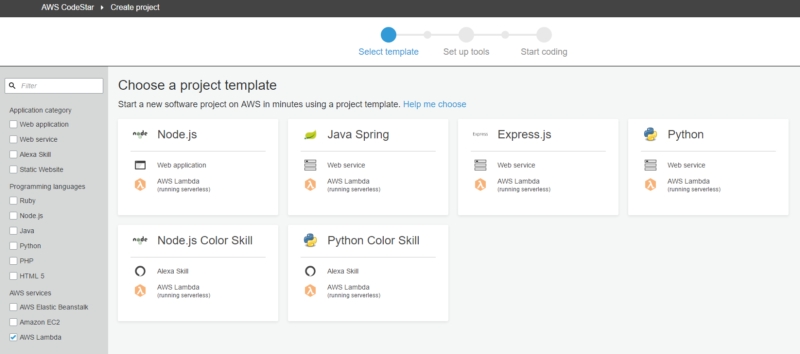
To use CodeStar, you first need to sign in with an IAM user who has administrative rights, then let CodeStar set up the corresponding IAM role for you and finally create your project by picking from a number of templates grouped by relevance such as Application Category, Programming languages or AWS Services. To keep it similar to the AWS for the Impatient series, we picked AWS Lambda from that list of templates.
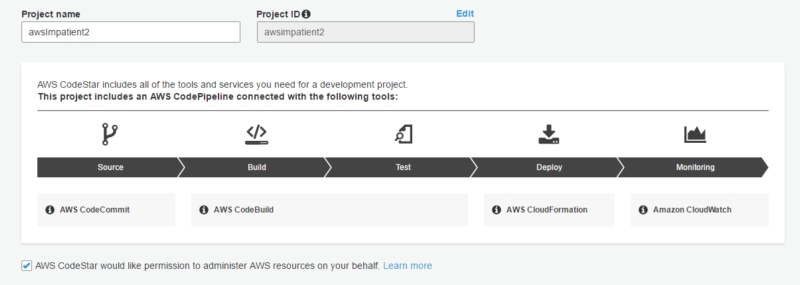
AWS CodeStar would like permission to administer AWS resources on your behalf. This lets Codestar takes care of the necessary permissions automatically. Without this tick it's back to square one, having to tweak things manually as discussed in the tutorials.
So naming our project awsImpatient sets up the following roles behind the scene:
and a corresponding awscodestar-awsimpatient-lambda-GetHelloWorld-I5540PWX8HH2 Lambda function based on the following code template:
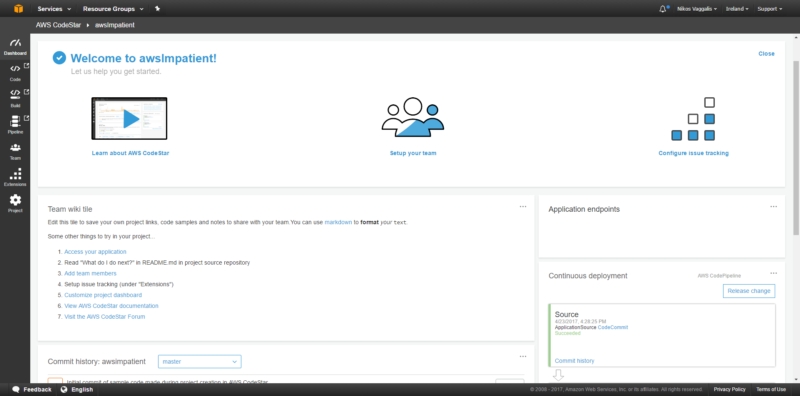
Finally your dashboard pops up, allowing you to manage all aspects of your project going through the menus of Code, Build, Pipeline, Team and Integrations.
In conclusion, the new Codestar console is certainly a step towards the right direction in handling a project's dependencies and associated workflow on the AWS platform.
More InformationIntroducing AWS CodeStar – Quickly Develop, Build, and Deploy Applications on AWS
Related ArticlesAWS Lambda for the Impatient Part 1 AWS Lambda for the Impatient Part 2 AWS Lambda for the Impatient Part 3
To be informed about new articles on I Programmer, sign up for our weekly newsletter, subscribe to the RSS feed and follow us on Twitter, Facebook or Linkedin.

Comments
or email your comment to: comments@i-programmer.info
|
|||
| Last Updated ( Monday, 24 April 2017 ) |