| Getting started with Windows 7 Gadgets |
| Written by Ian Elliot | ||||||
| Monday, 22 August 2011 | ||||||
Page 3 of 5 A debug flyoutUnless you have a full copy of Visual Studio debugging a gadget can be difficult because the alert function has been disabled and you can't open new windows. One improvement is that you can opt to see JavaScript error messages which are normally supressed by setting a registry entry:
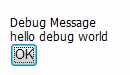
However you can add a debug window to make finding out what your gadget is doing. In addition to the settings window, a gadget can open another type of window - the flyout. The gadget can have as many flyout windows as it needs but only one can be on display at any given time. To make debugging easier, and to provide an example of using the flyout, let's create a debug flyout. First we need an HTML page to be used as the basis for the flyout: <html> Save this under the name Debug.html The <div> tag is going to be used to receive the text we want to display. The button is used to dismiss the flyout and simply sets its show property to false. The big difference between the Settings and Flyout windows are that Settings is modal and doesn't vanish until the user clicks on OK or Cancel but the Flyout vanishes as soon as it loses focus. The Gadget HTML starts out in the usual way: <html> It simply calls the debug function to display the message. The debug function, which can be added to any Gadget you are trying to debug, is fairly simple. First it sets the file that contains the HTML we want to use for the flyout and then sets the show property to true: function debug(message) At this point the flyout starts to load. To start making use of it we set its onShow handler to a function that we are about to write: System.Gadget.Flyout.onShow = showFlyout; We retrieve its document object and save the debug message in local variables: var oFlyDoc = System.Gadget.Flyout.document;
This is a sophisticated JavaScript feature called "closure" and it's very useful in situations like this: function showFlyout() If you try this out you should see the flyout appear and display the appropriate message. If you don't, try it a second time because for reasons that aren't clear sometimes the onload event isn't triggered when you reload a gadget.
The complete script is: <script>window.onload=function() |
||||||
| Last Updated ( Monday, 22 August 2011 ) |