| KML in Google Maps and Earth |
| Written by Ian Elliot | |||
| Tuesday, 06 May 2014 | |||
Page 1 of 2 KML is the way to code geographic data so that it can be displayed on a map. In this article we look at how KML works, how to use it in both Google Maps and Google Earth, and how to work with it in code.
In Getting started with Google Maps we looked at how to add a map into a web page using Google Maps and nothing but Javascript and a few bits of HTML that mostly didn't do anything other than set up the page. In the rest of this article it is assumed that you know how to set up a web page that creates a Google Maps or a Google Earth object that a script can work with - see Getting started with Google Earth. You can create almost any mapping facility you like using nothing but code but Google Maps and Google Earth support another way of doing the same job - KML or Keyhole Markup language. In case you are wondering why its "Keyhole" rather than "Mapping" or some other more relevant word the simple reason is that its in homage to the pioneering KH or Keyhole reconnaissance satellites. The basic idea is that KML is a dialect of XML used to describe locations or more generally the sorts of things you might want to add to a map display. Its a sort of HTML for places and geographic locations. You can use it to arrange data in a format that applications such as Google Maps and Earth can understand and use to create graphical displays as the correct location on a map. For example, in the previous article we discovered how to place default marker in Google Maps at a given location using Javascript:
The same thing can be achieved using KML and it works in both Maps and Earth:
You should be able to understand the way that the KML file is organised. If you don't follow any of it then read the tutorial on XML. However the principles are fairly obvious. The file always starts with the first two lines which identify the file as a dialect of XML and using the Google extensions to KML. After these two lines there are a list of nested tags. Each tag like <Placemark> has a closing tag like </Placemark> and other tag pairs are placed between them to refine the definition. A <Placemark> is a basic location on a map and you can use lots of other tags within it to specify the location and how it is displayed. In this case we simply use the <Point> tag to give longitude and latitude within a pair of <coordinates> tags. A common exampleThere are lots of tags that defined lots of different things and the art of using KML is simply discovering what tags do what and then making use of them. Obviously there are lots and lots of KML features that we could cover in this article but it make more sense to focus on the most commonly used techniques. The most common is to use a custom icon for the Placemark so lets see how this is done and add some additional tags:
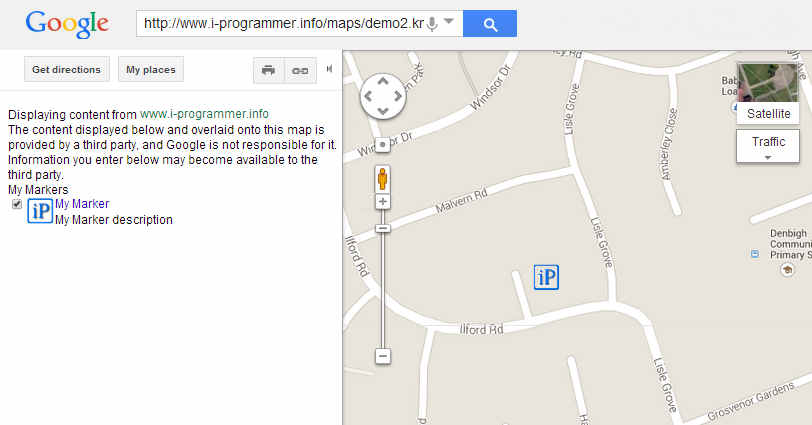
If you examine the example you should be able to work out what everything is doing. The <Document> tag can be used to group multiple items together - that is you can place multiple Placemark items in the single KML file. In this case it isn't necessary because there is only a single Placemark. The first <Name> tag assigns a name to the entire document, the second names the Placemark. The only complicated section is the <Style> tag which is used to group everything that relates to the way that the Placemark displays. In this case the only modification to the default style is to supply a custom icon. The <IconStyle> tag is the section that contains tags that set the icon's style but in this case the only thing we want to change is the icon itself and this is done by specifying a URL where the file is stored. You can use local files in this case and you can also zip the graphic into the XMZ file and it will be correctly extracted and loaded. If you have a kml file saved and hosted by a web server then you can display it on Google Maps. To do this you have to is go to Google Maps Click the "gear wheel" icon at the bottom right and select My Places. Finally copy and paste the URL of the KML file into the search box. If you want to try the demo listed above the file is available at http://www.i-programmer.info/maps/demo2.kml along with graphics file and when loaded into a map it displays as below:
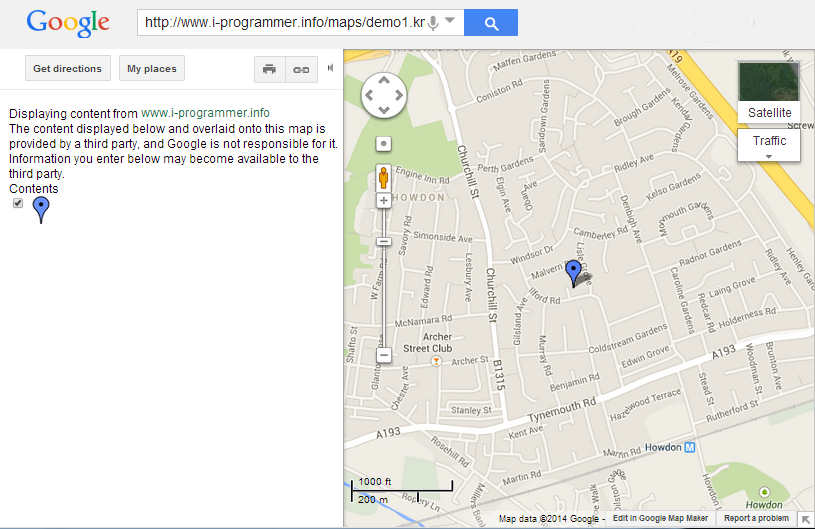
Our next problem is how exactly to display a KML file and make best use of our efforts. Maps or Earth?There are a number of different ways of displaying a KML file and they are each worth knowing about. You can display the file using either Maps or Earth. Each has some advantages and disadvantages so you do need to know how to work with both. Google Maps doesn't need a developer key to use and it doesn't need the user to download a browser plugin or desktop application. It is also more suitable for use on mobiles. However Google Maps has one disadvantage that is important to know about and understand the implications of. Using Google Maps you can only load a KML file that is accessible via a public URL. You also cannot get access to the objects created by the KML file via script. What this means is that you can create and use a KML file that is located on a server and you can even manipulate the file server side but you can't load or manipulate a KML file on the client side. Google Earth on the other hand has facilities to load KML file from a URL or from a local file and you can work with the object created by the KML file. That is you can do both server and client side manipulation of KML. KML in Google MapsGoogle Maps can only load a KML file from a publicly accessible URL. There are also a number of ways of doing this via the Google Maps web site and within your own code. From within Google Maps you can either use a URL that corresponds to the location of the KML file you have created or you can upload a local file and Google will host it for you internally. To do this you need to have a Google account. The simplest way of getting KML onto a map is if it is hosted by a web server as explained earlier. For example the demo file constructed earlier is available from the URL http://www.i-programmer.info/maps/demo1.kml If you type, or copy and paste this into the search box on Google Maps you will be taken to view the default pushpin marker.
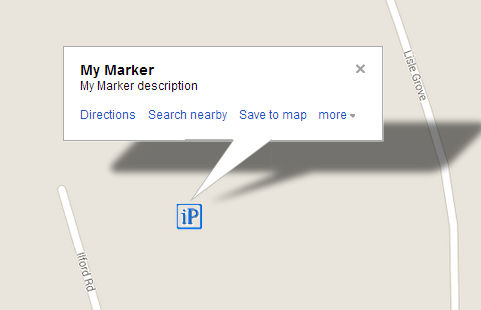
You can also save your KML to MyMaps and reload it when ever you need to - provided the file is still at the same URL. If you hover over the marker that the KML has added to the map one of the options that appears is Save to map.
If you select this option you can give the map a name and save it to My Maps for redisplay - select My Maps and your named map from the list. You also need to know that Google Maps caches the KML file and so any changes you make to it aren't necessarily visible when you refresh the page. If you do have a Google account you can upload a local KML file and have Google host it for you. Unfortunately at the time of writing you can't import a KML file to the latest Map Engine - you have to use the Classic Map. To do this first log in to your account on the Google Maps page or into any Google application. Next display a Google Map in your browser and click on Places form the "gear wheel" icon and then click on the "Or create with classic My Maps" link under the big red button marked "CREATE MAP". To import your KML file select the import link next to the Done button and specify the location of the file either a local file or a URL. Give the map a title and description if you want to and select either Public or Unlisted for a private map. The maximum file size supported is 10MB. Notice that this facility works by uploading and hosting your KML file on Google's own server so it isn't really directly accessing a local file. If the KML file is big then you can significantly reduce its size by zipping it. All you have to do is Zip the file and rename it to have a .KMZ extension. A KMZ file can be used just like a KML file and the application using it will automatically unzip the file after downloading it. <ASIN:1934356069> <ASIN:1593272715> <ASIN:1441942068> <ASIN:0470381248> <ASIN:0321559673> <ASIN:0470095288> |
|||
| Last Updated ( Tuesday, 06 May 2014 ) |