| A Simple Joomla Module with PHP and Eclipse |
| Written by Ian Elliot | |||
| Wednesday, 04 November 2009 | |||
Page 2 of 2
The main PHP fileThe main PHP has to be created in the main directory and by convention has a name the same as the module with a mod_ prefix e.g. mod_mymodule. As already explained all of the work can be done by the main PHP file but this isn't the usual way things are done. Any HTML output by the main PHP file is simply added to the position on the page that it is assigned to. It is worth going over the whole idea of positions defined within templates as a brief digression. 
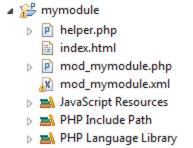
Recall that a page position is defined in the template used for the page. A position has to be listed in the templateDetails.XML file. For example: <positions> defines a position called MyPosition. The actual location in the template, i.e. the position on the page, is defined by the location of a <jdoc> tag within the template. For example: <jdoc:include type="modules" would load all modules that have been set to display at "MyPosition". Each module outputs its HMTL and replaces the <jdoc> tag in the template generated HTML. Notice that all of the modules set to display at "MyPosition" are loaded one after another according to the order specified using the Joomla administration site. The HTML that they generate is simply concatenated usually with the result that they display one after the other - but the usual HTML layout rules apply. It is useful to know that you can add ?tp=1 to the end of the usual URL that accesses your Joomla site to see all of the modules and positions defined in the current template. There are lots of <jdoc> tags and understanding how modules and other resources are loaded into the page constructed from the template is all about understanding <jdoc> tags. For example if you know you always want to load a particular module at a location in the page simply add to the template: <jdoc:include type="module" This executes MyModule and the HTML generated goes into the page at the location of the <jdoc> tag. Notice that using this method of loading a module you don't have to create or use a template position. To return to the code of the main PHP file now that we have the business of where the module will output its HTML solved. The first line of code is standard in nearly all Joomla PHP and simply ensures that the code cannot be loaded out of context: <?php defined( '_JEXEC' ) or Next we can code almost anything we like with the idea that any generated HTML will be output to the page position allocated to the module. In this case a simple hello world message is enough to prove that things are working. echo "hello basic module"; This completes the main PHP file and now we can try the module out - yes it really can be this simple. The structure of the module project in Eclipse should look something like:
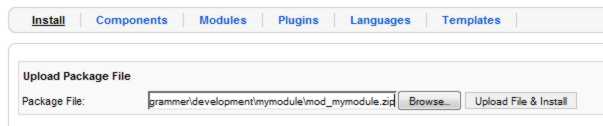
Testing the module.The next step is to navigate to the folders where the module development is setup - i.e. where you created the new Eclipse PHP project. Make sure you have saved the files that you have created in Eclipse - use Save All - and create a ZIP file called mod_mymodule.zip containing the three files: mod_mymodule.xml and index.html To install the trial module simply log on to the administration site and use the command Extensions, Install/Unstall and then use Upload Package File to browse to the ZIP file you have just created and Upload File & Install to finally install it.
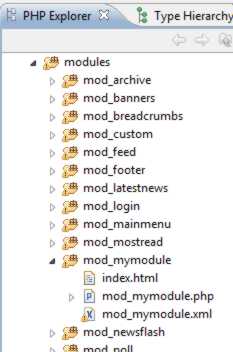
After this you should discover your module files installed in a subfolder called mod_mymodule under the modules directory within your Joomla site project.
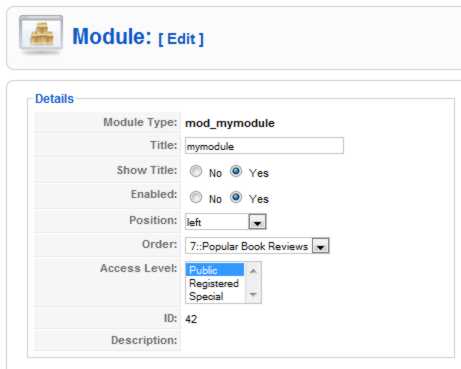
If you can't see anything new remember to use the File,Refresh command so that Eclipse will rescan the project for new files. Now you can run and debug the module in the usual way and view its effects on the development site. To see it in action you first need to log on to the administration site and select the module manager - Extensions, Module Manger. Your new module should be listed and clicking on it will take you to a generated editor where you can select a position for it to display and enable it.
You can also use the editor to change its title, display order and which menus it is associated with. Later, with a little more development you can add and set parameters which control exactly how the module behaves. As long as you have selected a position and enabled the module it should display the Hello World message when you view any of your site's pages.
Now you can edit the main PHP code to do something more interesting and update the installation module simply by copying the file back to the ZIP and to the module project if you want to keep it in sync. The only danger is that you might overwrite the wrong file by copying in the wrong direction. Another common mistake is to unistall the module before copying the modified files to the installation module ready for a complete clean install test - don't say you haven't been warned.
<ASIN:1430216425> <ASIN:0137012314> |
|||
| Last Updated ( Wednesday, 03 March 2010 ) |