| Insider's Guide To Udacity Android Developer Nanodegree Part 3 - Making the Baking App |
| Written by Nikos Vaggalis |
| Monday, 03 July 2017 |
|
Page 2 of 8
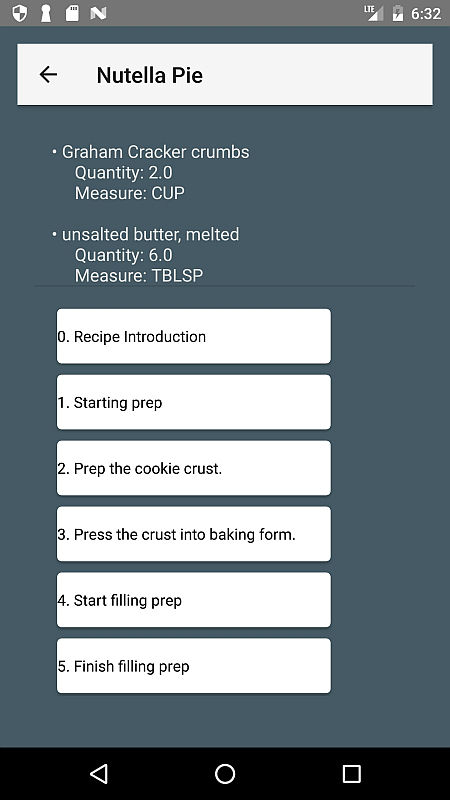
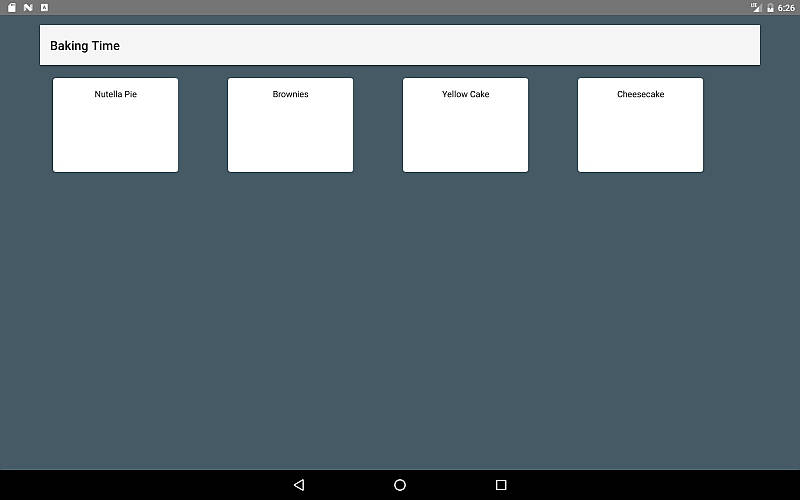
In contrast, when on a Tablet device the launcher activity, RecipeActivity. should act as the Tablet's did:
but the RecipeDetailActivity should host both RecipeDetailFragment and RecipeStepDetailFragment side by side, in order to implement the Master-Detail flow. Again, that's the magic of fragments, in allowing for UI component reuse as deemed necessary.
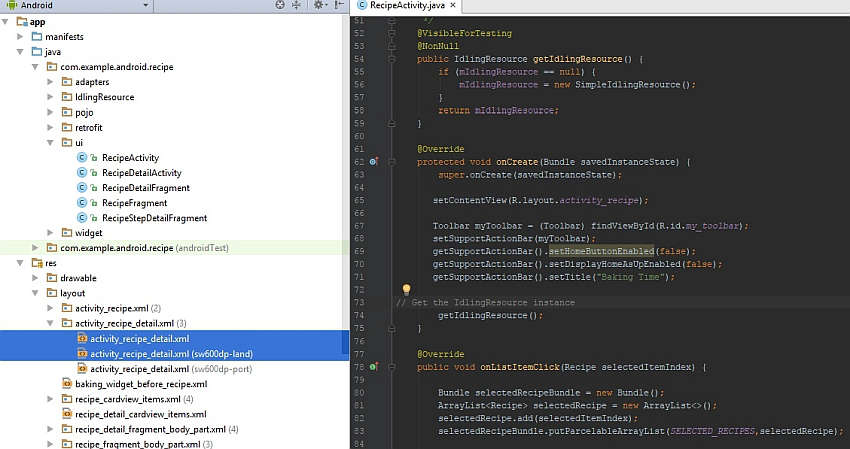
Tablet/Landscape,RecipeDetailActivity/RecipeDetailFragment Since the RecipeFragment won't be changing during the runtime of its host RecipeActivity, we can consider it a Static Fragment, which means that we can treat it and load it as a simple design time layout like every other.The two other fragments however, RecipeDetailFragment and RecipeStepDetailFragment, are added and replaced by the FragmentManager (the component burdened with this sort of tasks) during the runtime of their respective host RecipeDetailActivity, as such they are considered dynamic and will instead be enclosed by and loaded into their so called Fragment Containers, fragment_container and fragment_container2. Each device has its own layouts, so on a Tablet we should load both fragment_container (for RecipeDetailFragment) and fragment_container2 (for RecipeStepDetailFragment) side by side, while on a Phone only fragment_container (for RecipeDetailFragment, which gets replaced by RecipeStepDetailFragment). Hence we need a way in code to tell case from case.The trick here is that each case has its own dedicated layout stored in the respective subfolder underneath the project's 'res' folder. So inside the default 'layout' folder we have the one size fits all 'activity_recipe_detail.xml' layout that contains the single fragment_container, while inside the 'layout-sw600dp-land' folder we have the specially crafted 'activity_recipe_detail.xml' layout that contains both fragment_container and fragment_container2.sw600 stands for smallest width and 600dp denotes the Tablet's dimensions.
So while the layouts differ, RecipeDetailFragment's and RecipeStepDetailFragment's underlying code remains unaltered, but should be developed to cater for each case.This can be done at runtime by checking which kind of layout is currently loaded.So when on a Phone, the layouts under the default 'layout' folder get loaded, while on a Tablet and in landscape mode those in 'layout-sw600dp-land' are used. /**** RecipeDetailActivity ****/ if (findViewById(R.id.recipe_linear_layout).getTag()!= null && findViewById(R.id.recipe_linear_layout)
.getTag().equals("tablet-land"))
{ final RecipeStepDetailFragment fragment2 = new RecipeStepDetailFragment();
fragment2.setArguments(selectedRecipeBundle);
fragmentManager.beginTransaction() .replace(R.id.fragment_container2, fragment2) .addToBackStack(STACK_RECIPE_STEP_DETAIL) .commit(); }
So if the layout currently loaded is tagged as "tablet-land" then I know that that's 'activity_recipe_detail.xml' of 'layout-sw600dp-land' and therefore I can follow the multi pane branch of code. Note the use of the FragmentManager which is the class that provides the methods that allow you to add, remove, and replace fragments in an activity at runtime. Yet, another property of fragments is their ability to push onto the fragment stack, which I'm going to use for implementing the Back Arrow's functionality.
and
pushing the fragment instances onto the stack one after another and in LIFO fashion. Now when pressing the toolbar's back arrow we pop them off the stack in the following order. When the user stares at the screen with the Video instructions, which means that the RecipeStepDetailFragment is loaded, pressing the back arrow takes him back to the screen with the list of the recipe's steps, popping RecipeStepDetailFragment off the stack and replacing it with RecipeDetailFragment. At the RecipeDetailFragment screen, pressing the back arrow again ends host RecipeDetailActivity by calling finish() and goes back to the launcher RecipeActivity so that the user can check another recipe. /**** RecipeDetailActivity Back Arrow ****/ myToolbar.setNavigationOnClickListener(new View.OnClickListener() { @Override public void onClick(View v) { FragmentManager fm = getSupportFragmentManager(); if (findViewById(R.id.fragment_container2)==null) { //called when fragment_container2 exists, //that is both fragments are side by side if (fm.getBackStackEntryCount() > 1) { //go back to "Recipe Detail" screen fm.popBackStack(STACK_RECIPE_DETAIL, 0); } else if (fm.getBackStackEntryCount() > 0) { //go back to "Recipe" screen finish(); } } else { //go back to "Recipe" screen finish(); } } }); }
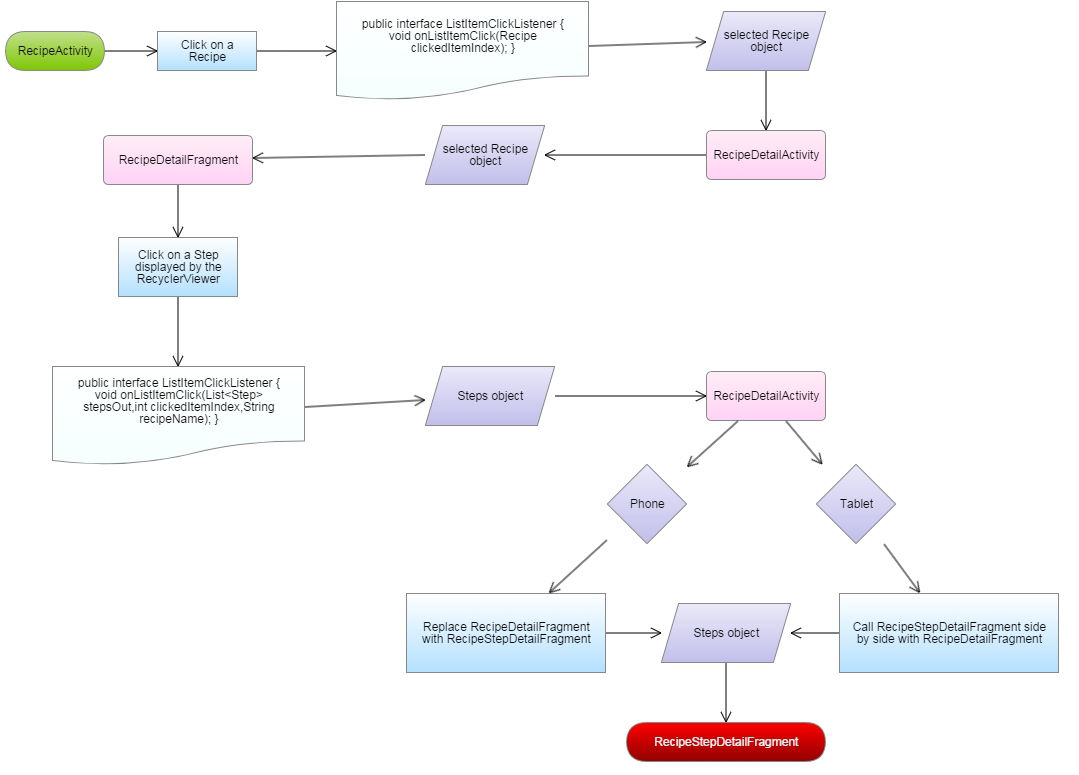
Fragment to Fragment and Fragment to host Activity CommunicationIt's important to note that all communication, be it Fragment to Fragment or Fragment to Activity, is governed by the Control and Command center of the host Activity.That is so because our fragments should be as self contained as possible in order to be modular and reusable. As such letting fragments call into each other would defy this purpose and unnecessarily raise the application's complexity. Going with the flow, the action of choosing a recipe to check from within the RecipeActivity packs the associated Recipe object, selectedRecipe, with its associated Ingredients and Steps lists in a ParcelableArrayList and forwards it to the RecipeDetailActivity which in turn forwards to its fragment(s).
/**** RecipeDetailAdapter-ListItemClickListener interface ****/ public interface ListItemClickListener { void onListItemClick(List<Step> stepsOut, int clickedItemIndex,String recipeName);
}
@Override public void onClick(View v) { int clickedPosition = getAdapterPosition(); lOnClickListener.onListItemClick(lSteps, clickedPosition,recipeName);
}
public class RecipeDetailActivity extends AppCompatActivity implements RecipeDetailAdapter.ListItemClickListener{}
public void onListItemClick(List<Step> stepsOut, int selectedItemIndex,String recipeName)
fragment.setArguments(stepBundle)
replace(R.id.fragment_container,fragment) .addToBackStack(STACK_RECIPE_STEP_DETAIL)
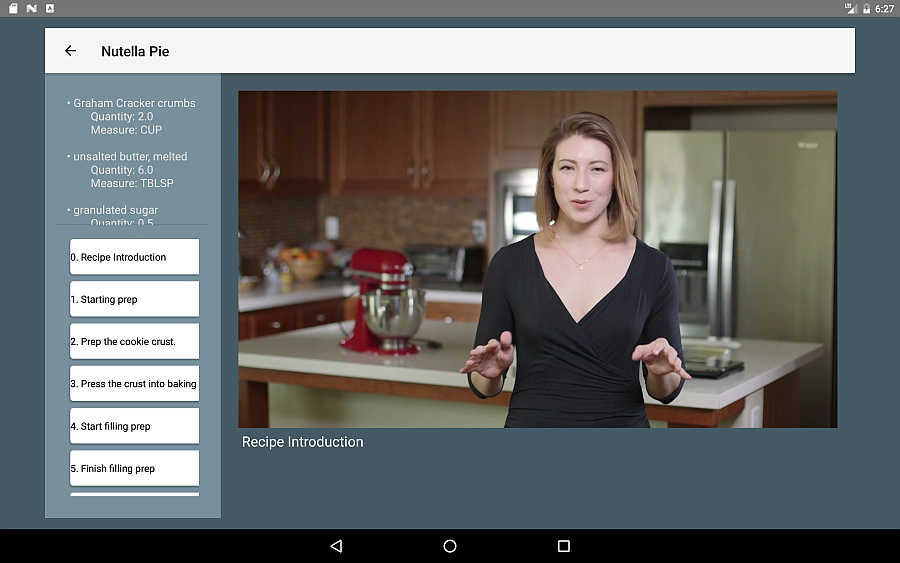
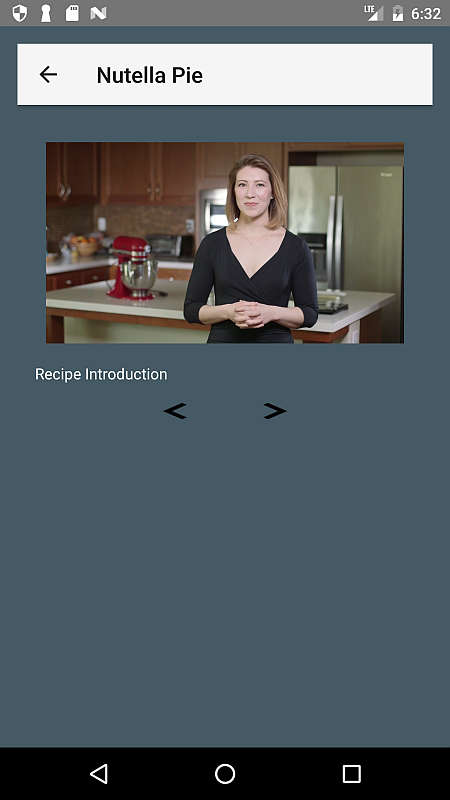
in order to show the video of Miriam going over the chosen step's instructions.
|
| Last Updated ( Monday, 20 November 2017 ) |
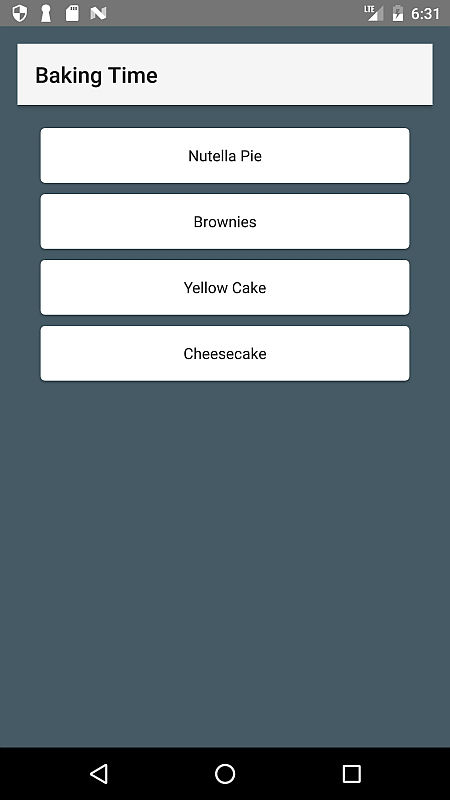
 Tablet/Landscape,RecipeActivity/RecipeFragment