| Kinect SDK1 - A 3D Point Cloud |
| Written by Mike James | ||||
Page 3 of 3
Adding the Kinect
Now we come to the easy part of the project - adding the Kinect. All we need is a basic depth map and this is well described in earlier chapters. You need to include a reference to
and to avoid having to type fully qualified names add:
to the start of the code. Add
to the global variables. We go through the usual initialization procedure to get the Kinect ready to supply a depth map:
Of course our next task is to write the event handler. This has to retrieve the depth data from the Kinect:
Now we have the depth data as an array of short integers. All we have to do now is move each pixel in turn to the new z position by updating its translation transform:
That's all you have to do. Now when you run the program you will see triangles positioned according to the depth returned by the Kinect. It takes some time to get used to reading the image, but you should be able to see shapes and the 3D effect should be clear. Try modifying the angle of view and the distance the camera is from the point cloud. Notice also that the field of view is left right reversed - this is a consequence of turning the camera upside down!
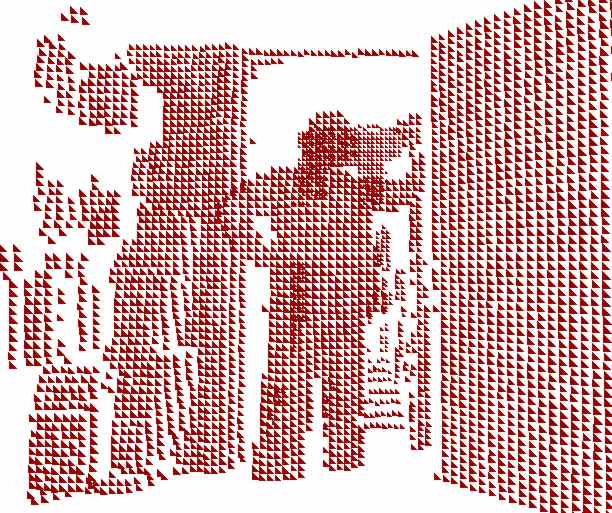
A person standing in a doorway The results are more impressive when you view a moving 3D image rather than a static screenshot, but there are a few things you need to understand about the image. The first is that areas that have no points are either to far away or too close. Each point in the depth field is positioned at a particular depth and because of the perspective projection the this makes it appear to leave a sort of shadow if itself in the background as triangles are x,y displaced in the image. You can also get some interesting results by placing the view camera at an angle to the z direction. which is the direction the Kinect is pointing in. This allows you to look sideways at the depth image.
You can download the code for this program from the CodeBin (note you have to register first). Further ReadingPractical Windows Kinect in C#
|